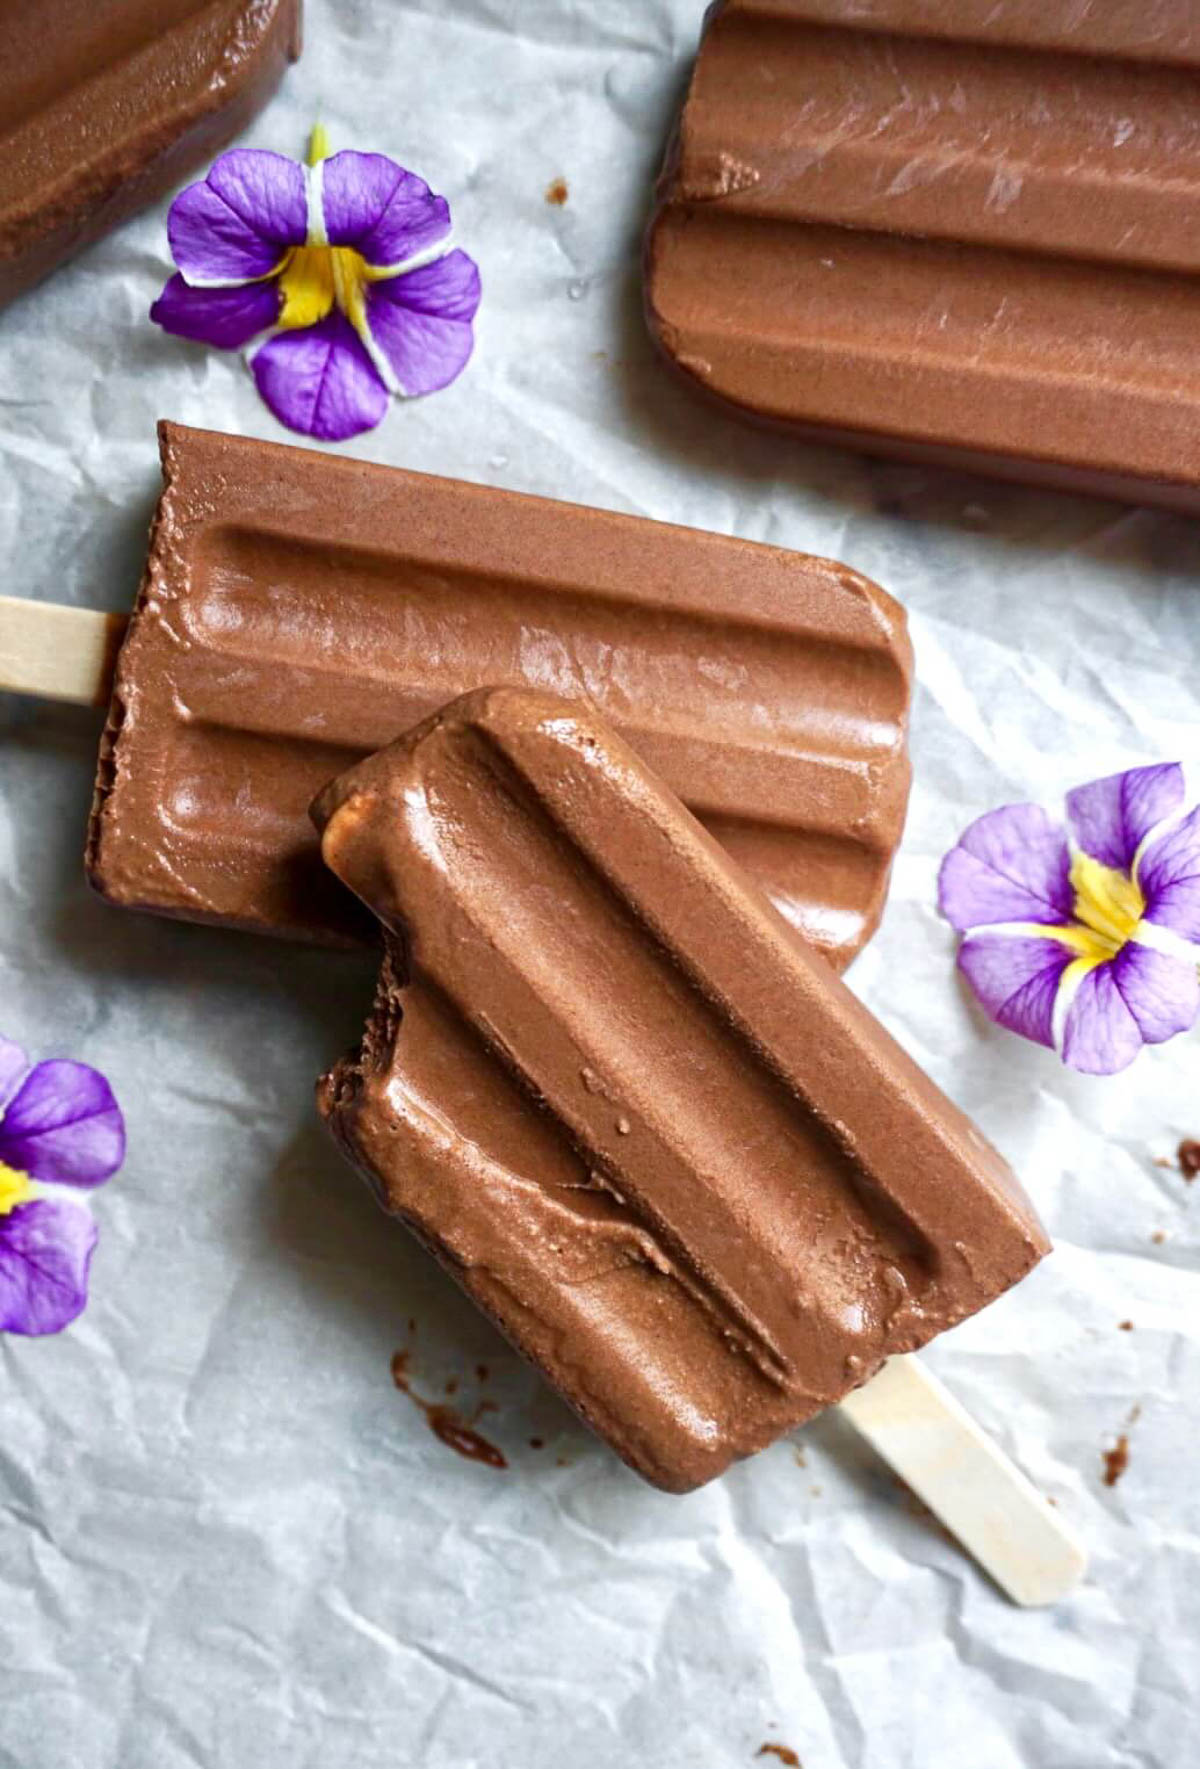
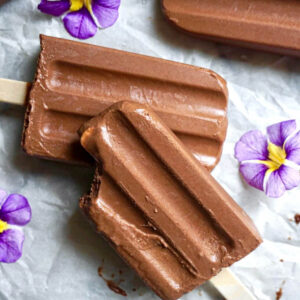
Healthy Fudgesicles (Vegan, Dairy-Free)
Beat the heat with these healthy fudgesicles that are rich, creamy, and not icy! Made with 5 simple ingredients, they’re naturally sweetened, vegan, and dairy-free. Just blend, pour, and freeze for an easy, better-for-you summer dessert!
These remind me of my vegan chocolate crunch ice cream bars and chocolate nice cream with that same rich texture, just in fudgesicle form!
Quick Look: Vegan Fudgesicles
- Ready In: 10 minutes prep + 4 hours freeze time
- Servings: 6 fudgesicles
- Calories: ~126 per fudgesicle
- Key Ingredients: Coconut cream, non-dairy milk, cocoa powder, maple syrup, vanilla extract
- Dietary Info: Vegan, dairy-free, gluten-free, refined sugar-free, naturally sweetened
- Texture: Smooth and creamy (not icy!)
- Flavor: Rich and chocolatey, just like classic fudgesicles!
- Perfect for: A healthy dessert or refreshing summer treat
Making vegan ice cream is a summer tradition in our house. I always like to keep something cold and creamy in the freezer, whether it’s vegan cookie dough ice cream, dairy-free chocolate ice cream, or these healthy fudgesicles.
I must admit, this homemade version tastes even better than store-bought. With just 5 ingredients, they’re super easy to make, kid-approved, and my grandpa even said he prefers these vegan fudgesicles over the originals, which I think says everything!
Featured Review
“HANDS DOWN THE BEST FUDGESICLES. I make these for my toddler, and they are such an easy, guilt-free way to give her that sweet summer treat! Our whole family love love loves these!”
– Daniele
Table of Contents
Why You’ll Love This Recipe
- Super creamy texture: Coconut cream’s high fat content is the secret to that smooth and creamy texture.
- Easy to make: Just blend, pour, and freeze!
- Rich chocolate flavor: A good-quality cocoa powder gives these that classic fudgesicle flavor.
- Naturally sweetened: Maple syrup adds the right amount of sweetness without any refined sugars.
- Simple ingredients: Made with just 5 ingredients that are vegan, dairy-free, and refined sugar-free.

Ingredients Needed
Here’s everything you need to make these healthy fudgesicles at home:
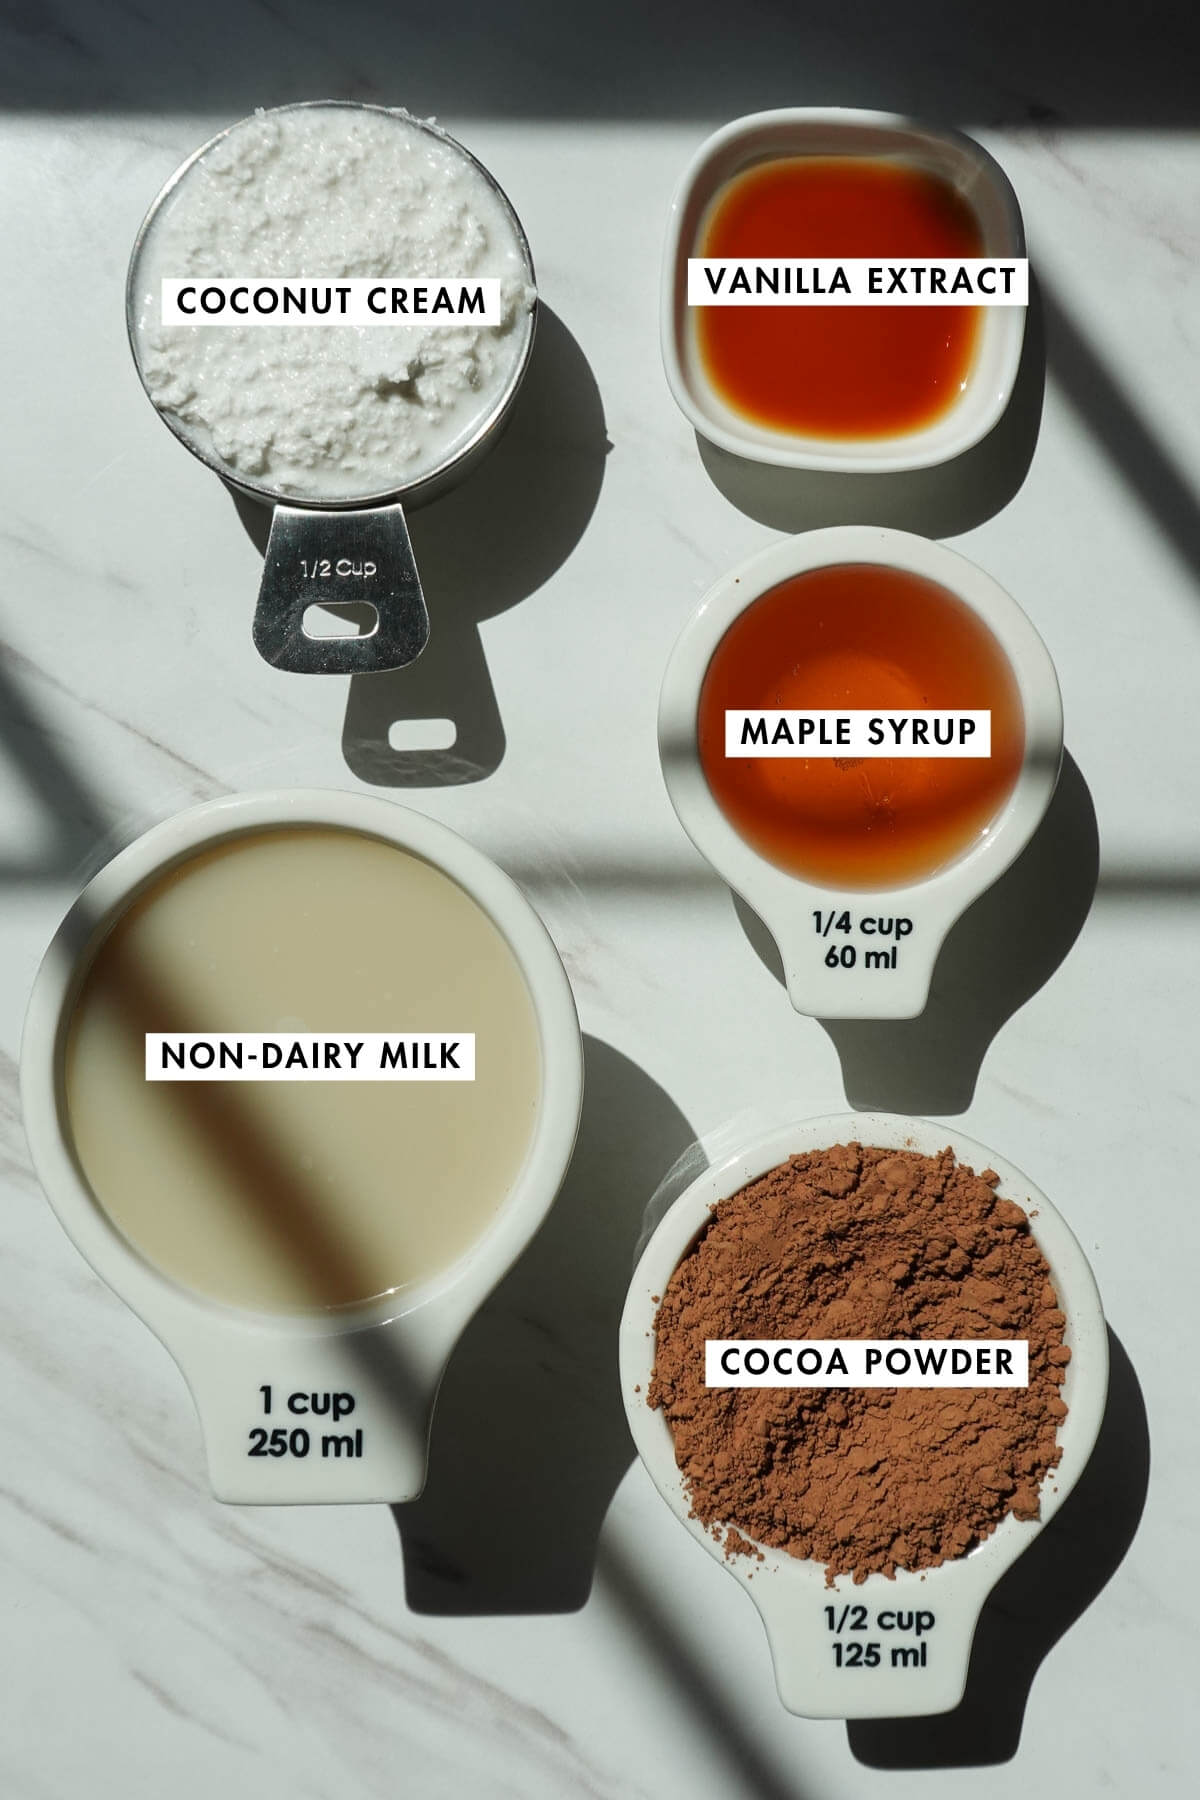
- Coconut Cream: The thick, creamy layer from a chilled can of coconut milk or coconut cream. Use any leftover coconut milk to make my coconut cream pie stuffed dates or almond joy smoothie!
- Non-Dairy Milk: Any non-dairy milk works here, like oat milk, almond milk, or soy milk.
- Cocoa Powder: This is where the chocolate flavor comes from, so use one you love. I usually reach for Trader Joe’s or Target’s brand.
- Maple Syrup: For natural sweetness.
- Vanilla Extract: Just a splash for vanilla flavor.
This is just a recipe overview! Scroll down to the recipe card to get the full recipe with measurements.
Substitutions & Variations
- Maple Syrup: Swap with agave. Honey also works, but it will make the recipe non-vegan.
- Chocolate Peanut Butter: Add a spoonful of peanut butter before blending for a rich, chocolate-peanut butter twist, similar to my vegan klondike bars.
- Chocolate Peppermint: Add a few drops of peppermint extract for a minty version.
- Protein Boost: Blend in a scoop of your favorite vegan chocolate protein powder.
- Extra Chocolatey: Drizzle melted chocolate on top, or dunk the whole thing in melted chocolate, like I do in my dairy-free chocolate crunch ice cream bars!
How to Get Creamy (Not Icy) Fudgesicles
One of the biggest mistakes with vegan fudgesicles is that they turn out icy instead of creamy. We never want that! Here’s how to get that creamy texture:
- Use coconut cream, not coconut milk: Coconut cream has a higher fat content, which keeps the fudgesicles soft and creamy instead of hard and icy. Same reason I use it in my vegan chocolate crunch ice cream bars!
- Don’t skip the sweetener: Maple syrup doesn’t just add sweetness, it also adds to the overall texture, so don’t swap it for granulated sugar.
- Use the right ratio of liquid to fat: The balance of coconut cream and non-dairy milk is important here, so I don’t recommend adjusting it.
- Blend until completely smooth: This is key to getting that smooth texture.
- Let sit for a little before enjoying: Letting the fudgesicles sit at room temperature for 5-10 minutes will make them soften slightly for that perfect creamy bite.
How to Make Vegan Fudgesicles (Step-by-Step)
Here’s how to make these vegan fudgesicles step-by-step:
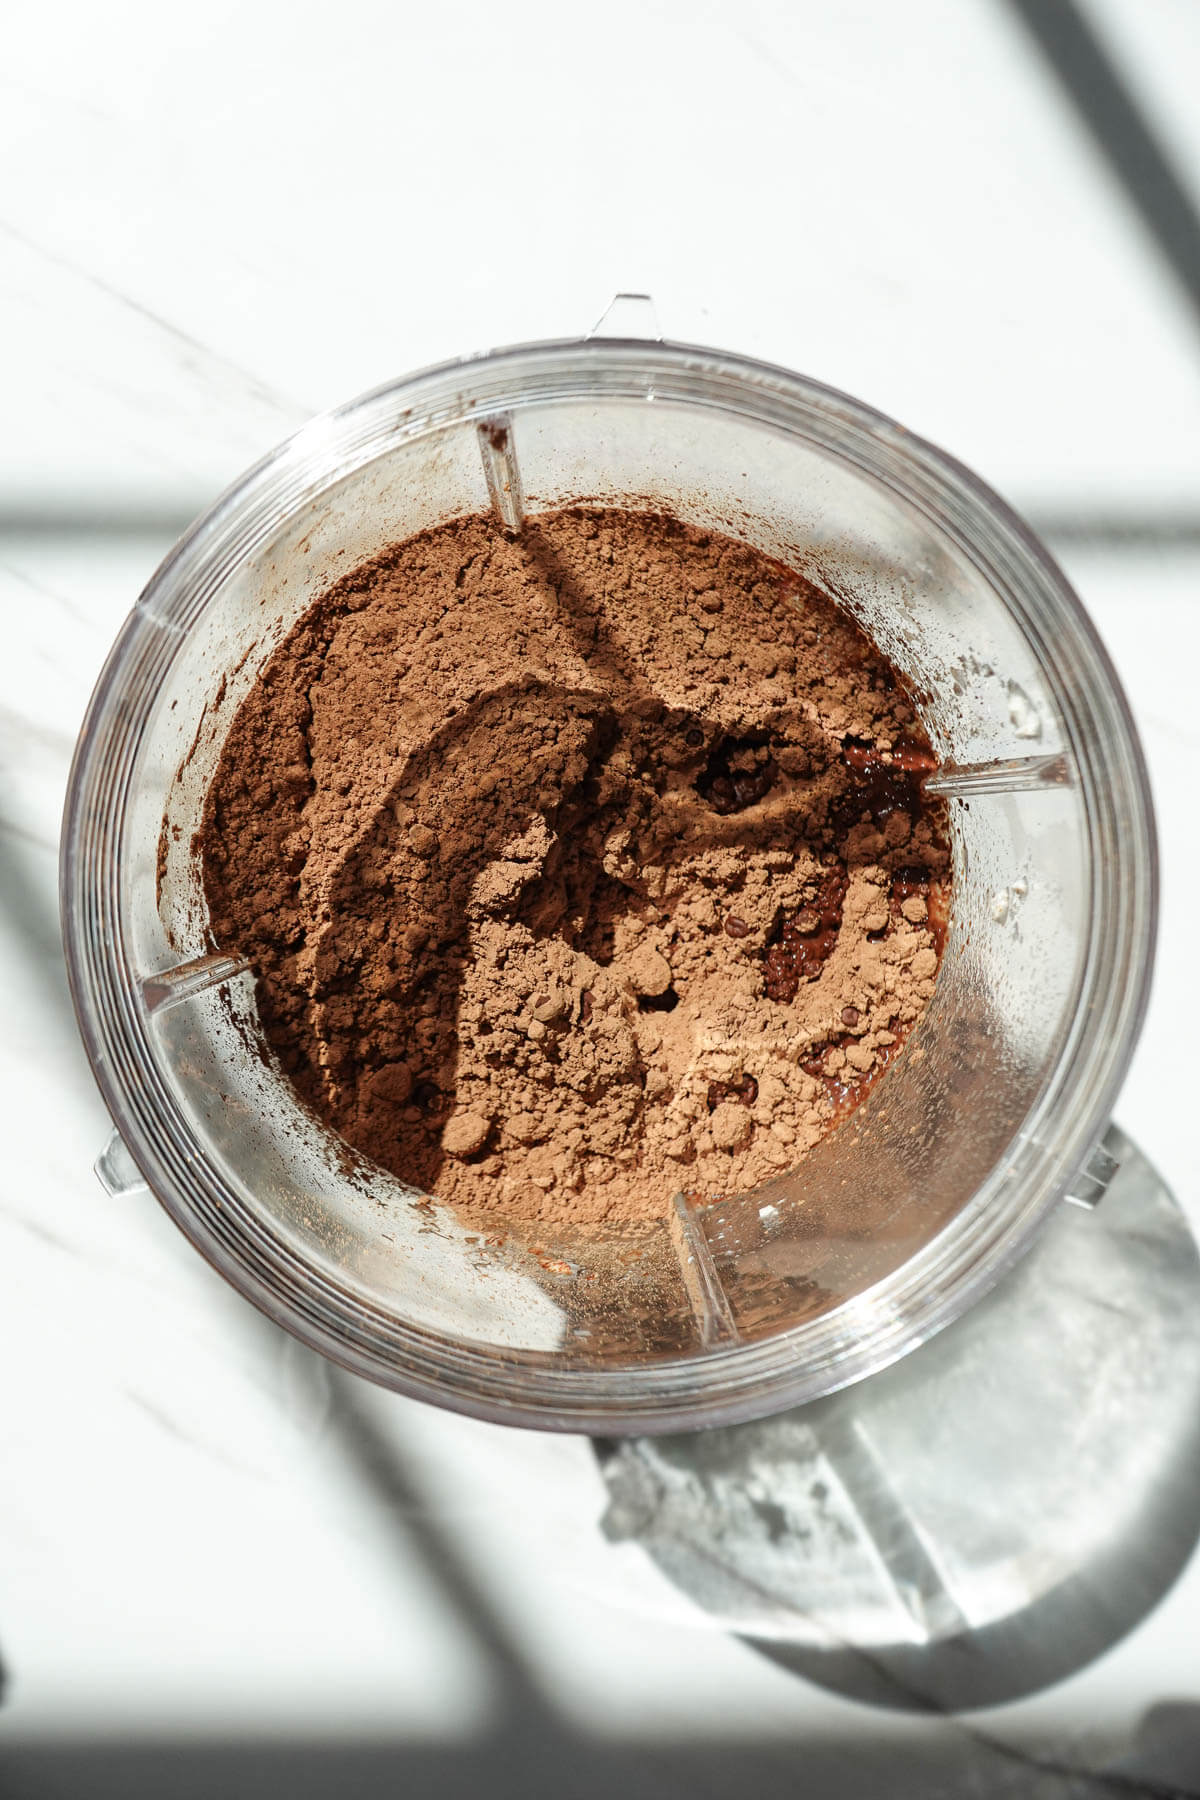
- Step 1: Add the coconut cream, non-dairy milk, cocoa powder, maple syrup, and vanilla extract to a blender.
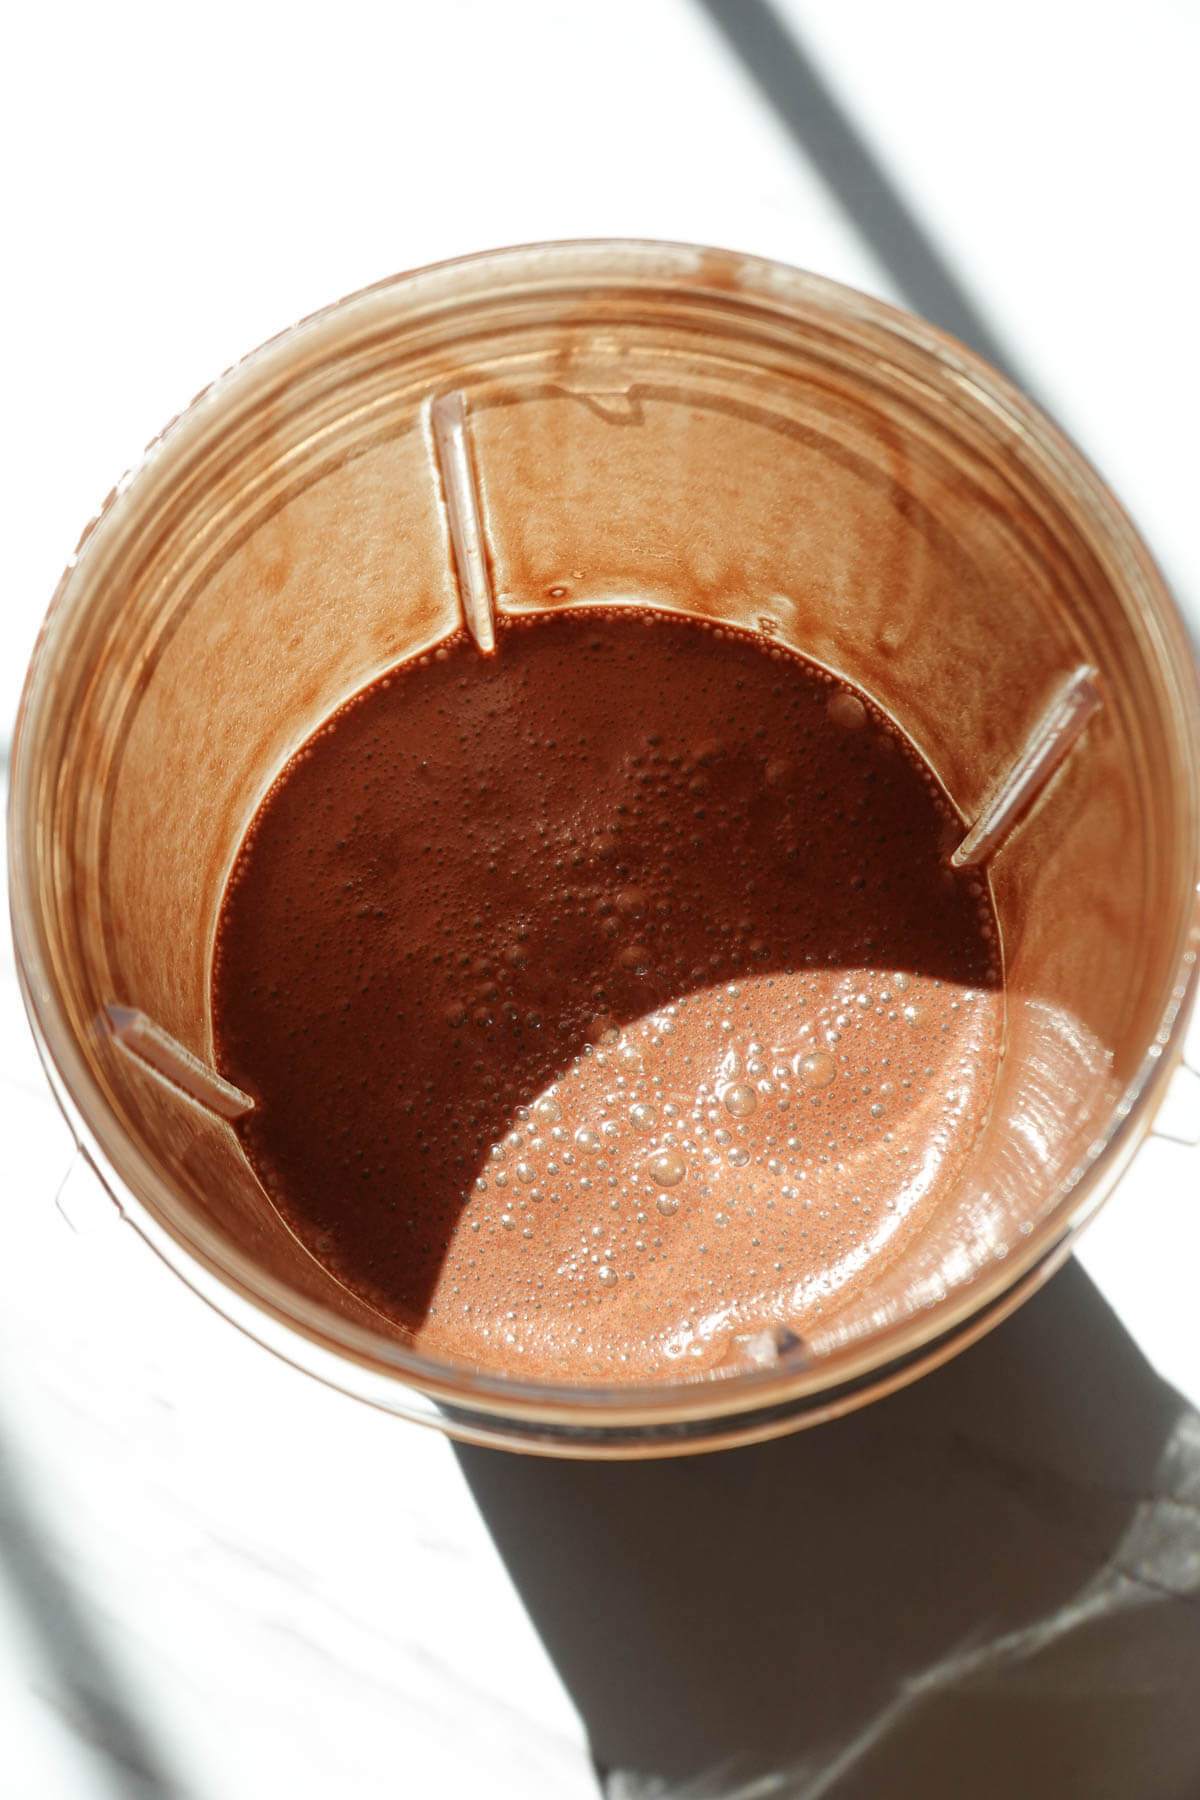
- Step 2: Blend until smooth and creamy.
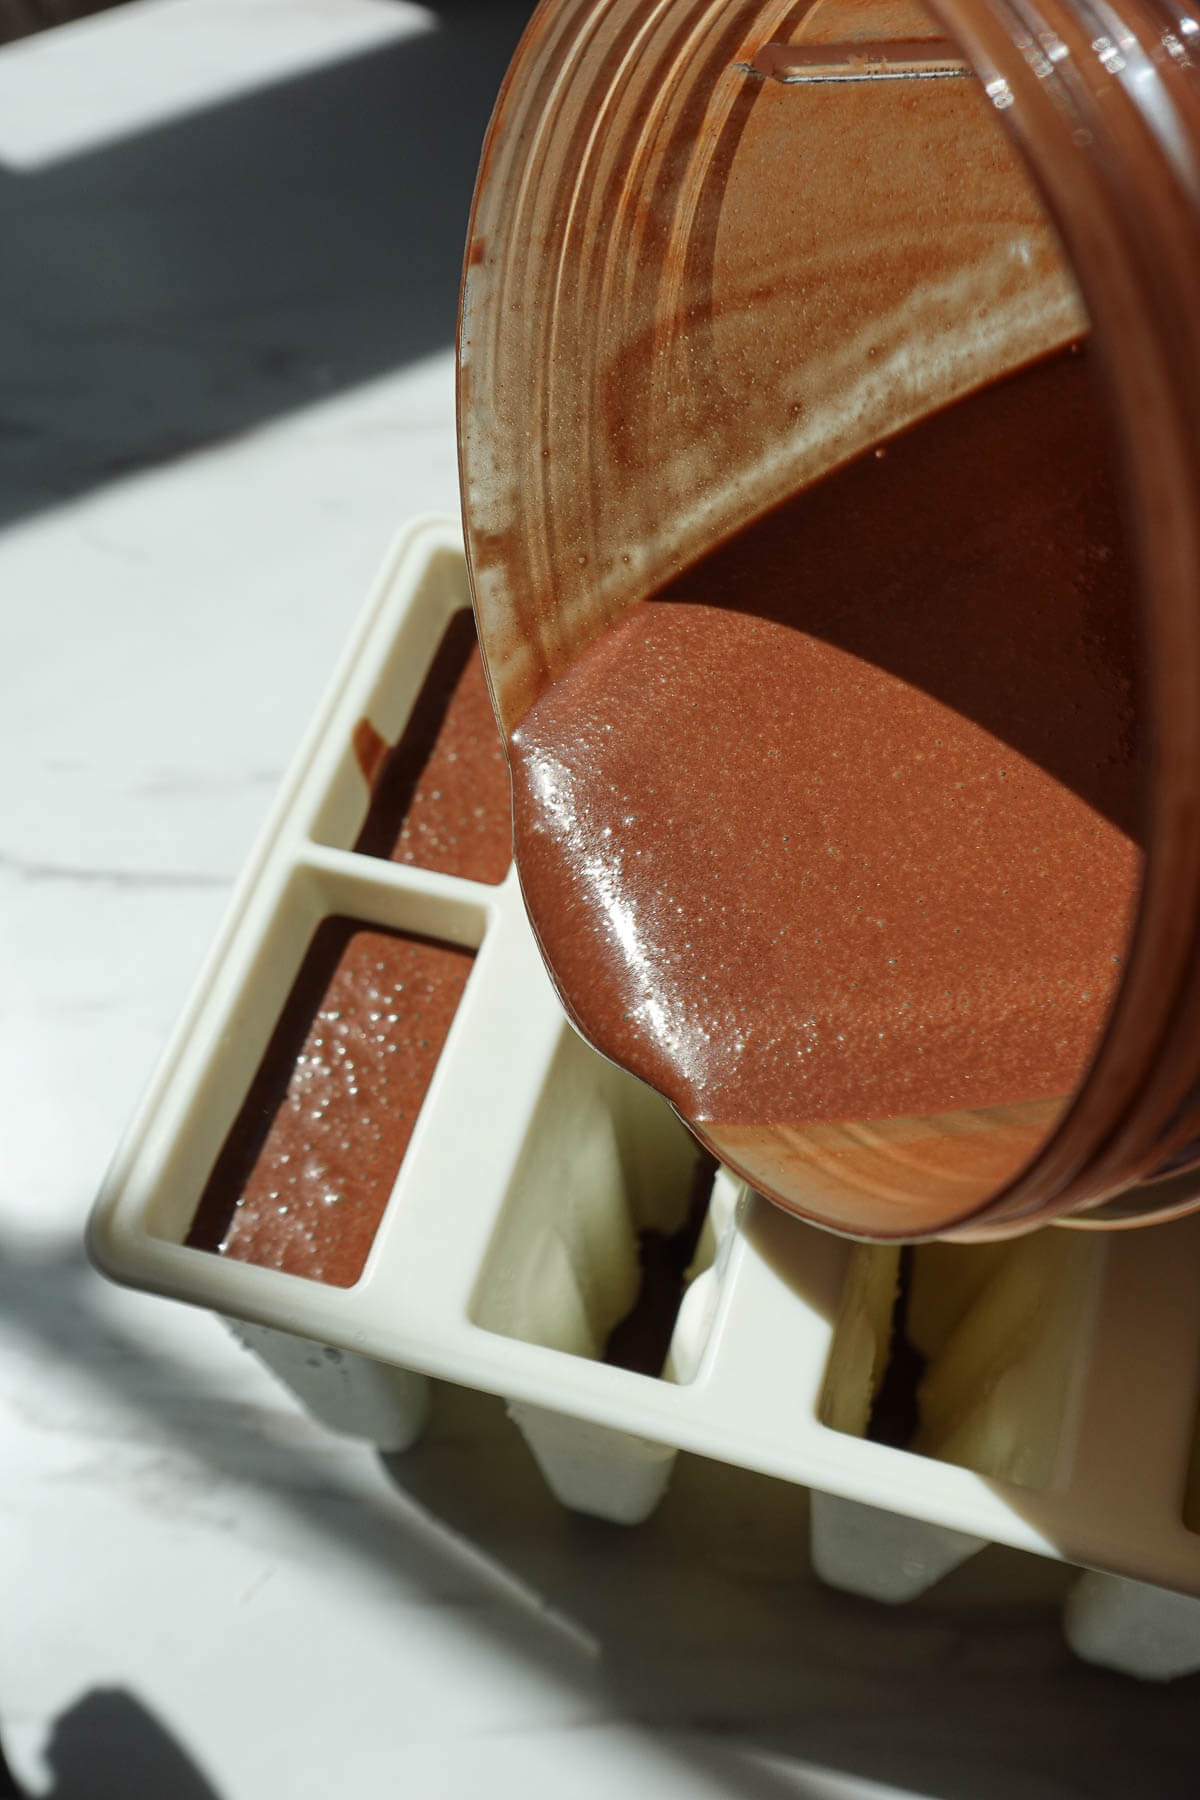
- Step 3: Pour the mixture evenly into popsicle molds.
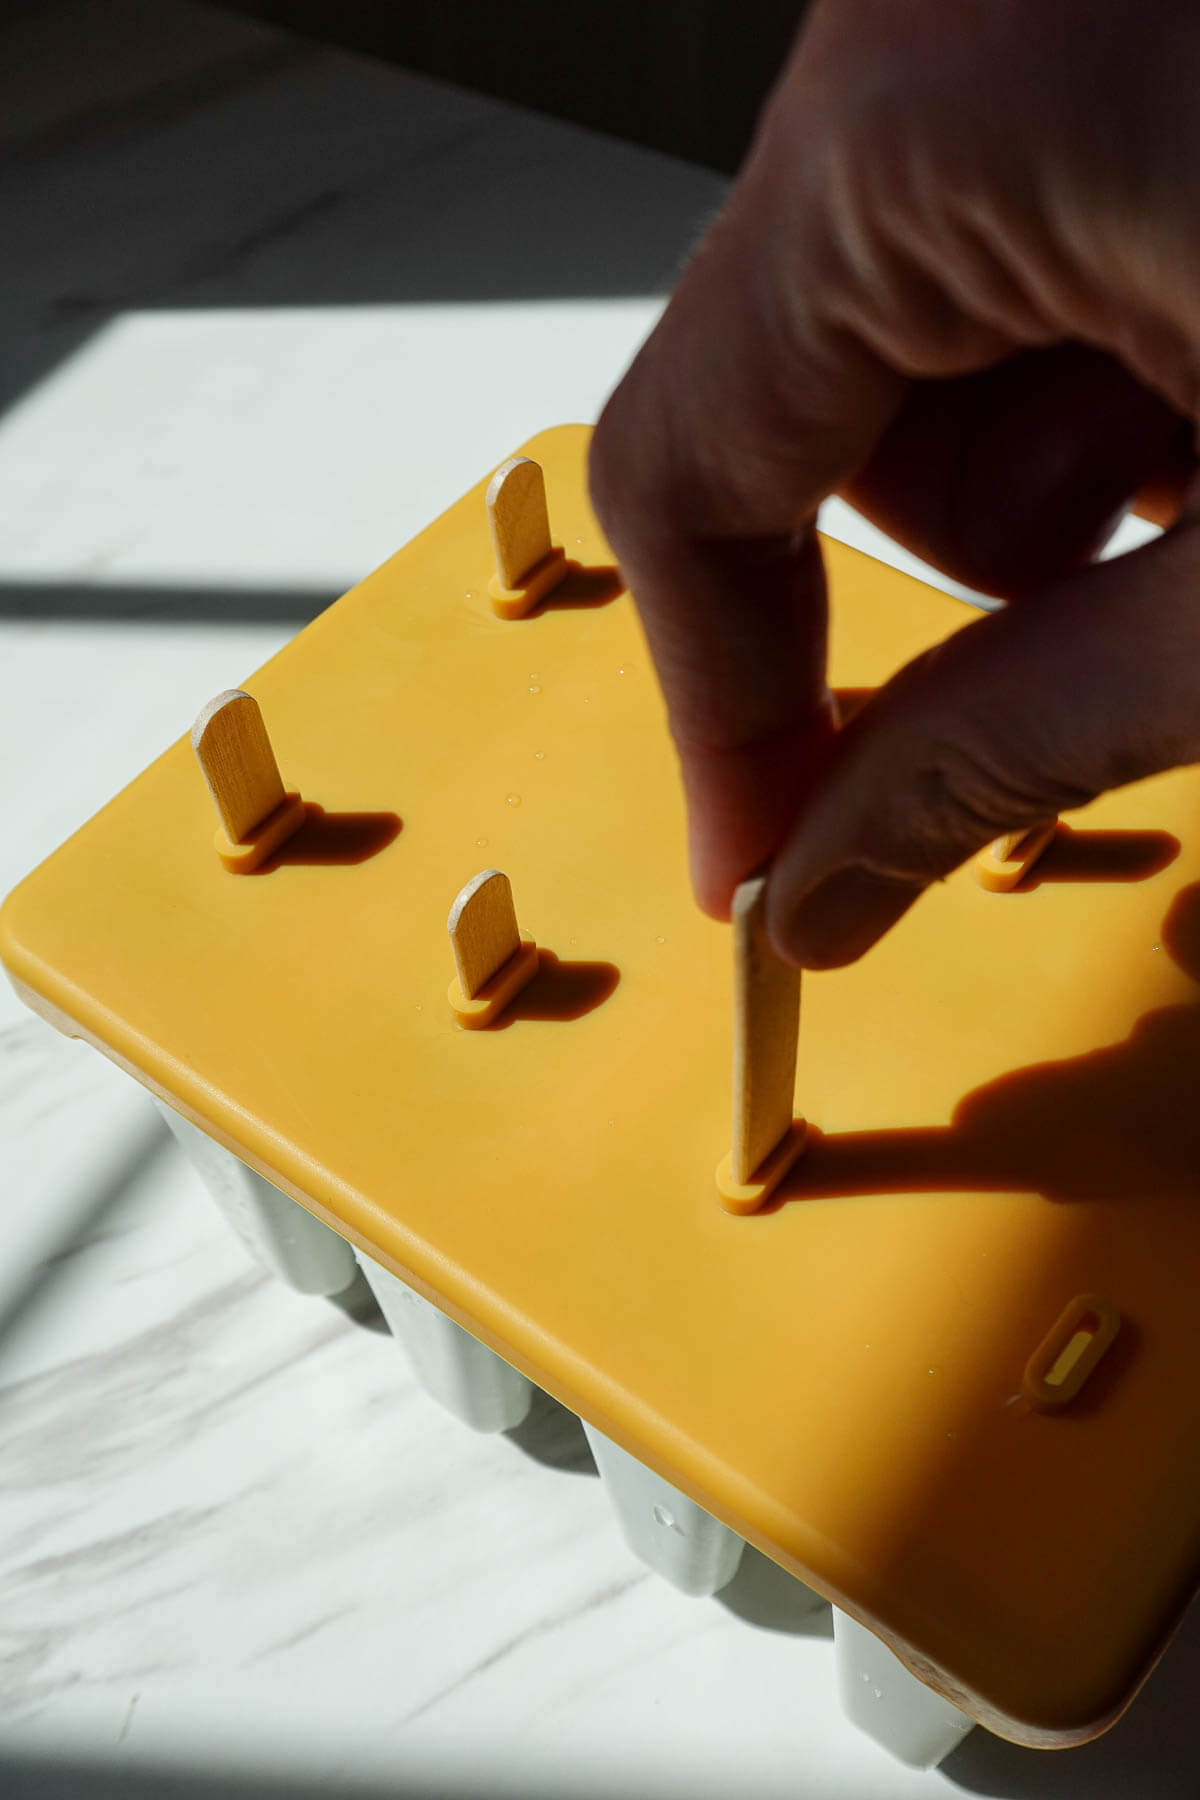
- Step 4: Add sticks and freeze for 4–6 hours, or overnight.
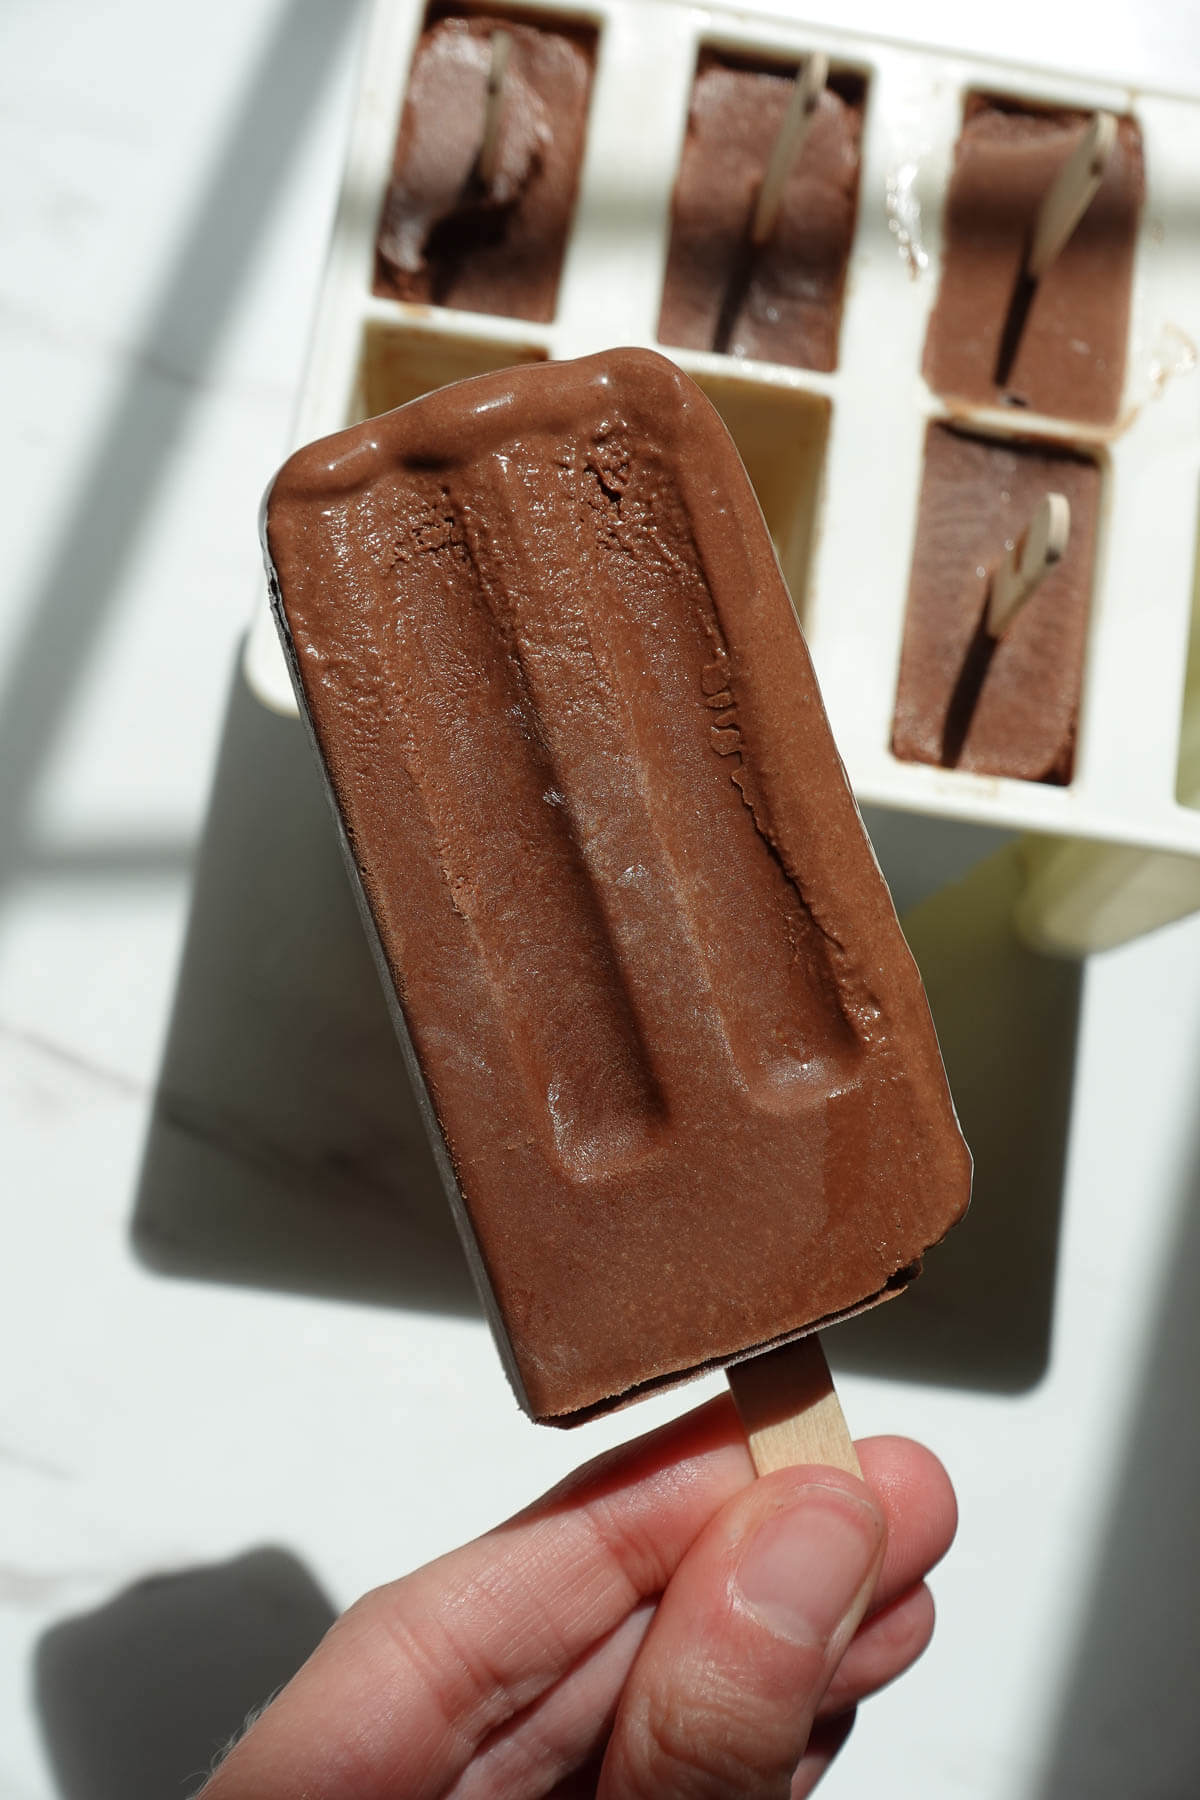
- Step 5: Run the molds under warm water for 15–30 seconds, then gently pull out your fudgesicles.
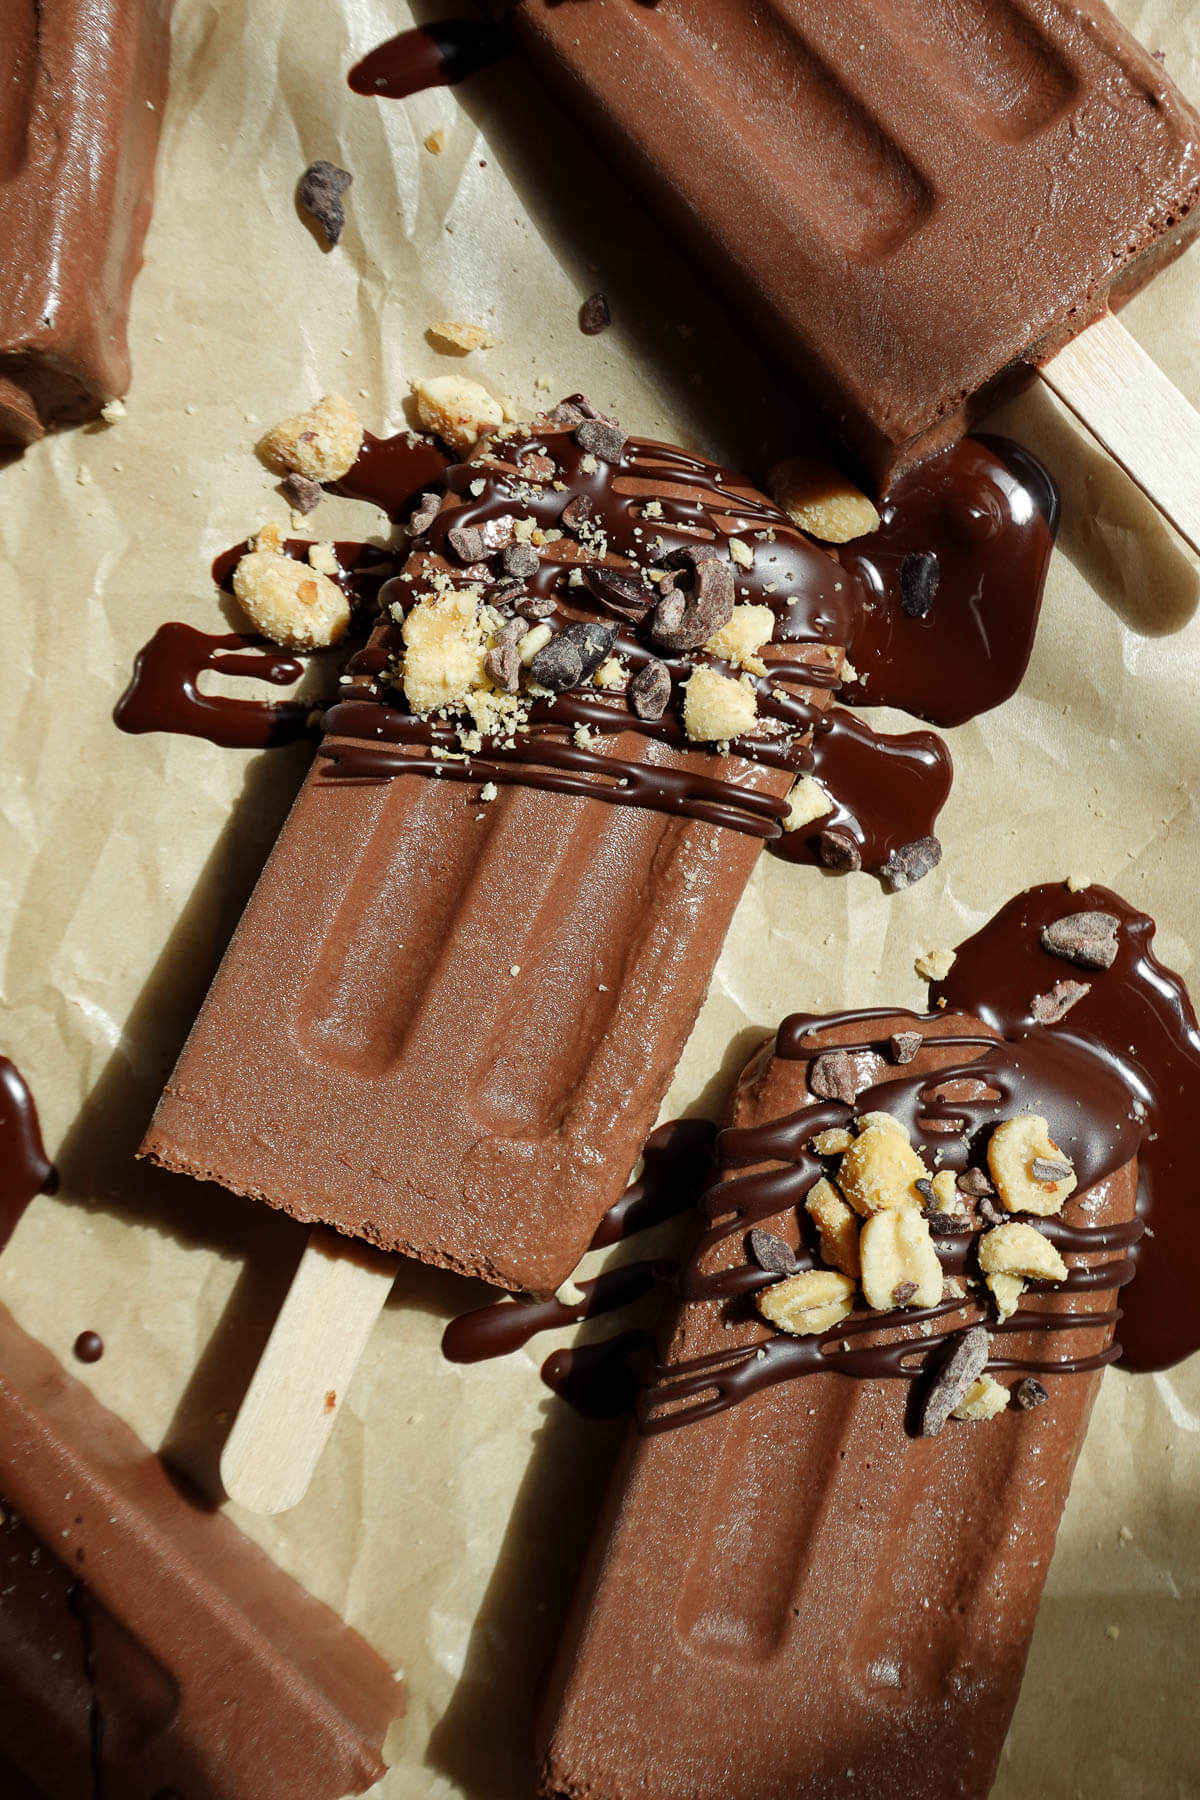
- Step 6: Sometimes I like to drizzle these vegan fudgesicles with melted dark chocolate and sprinkle on chopped peanuts. Enjoy!
Megan’s Tips
- Use coconut cream, not coconut milk: Coconut cream is what gives you that creamy texture, similar to a fudgesicle. Without it, they can turn icy.
- Use a silicone ice cream mold: This makes removing them sooo much easier.
- Having trouble removing your fudgesicles from the molds? I use silicone molds and they work like a dream every single time! Just run the molds under warm water for 15-30 seconds, and they will slide right out.
Homemade Fudgesicles FAQs
This usually happens when there isn’t enough fat in the mixture. This is the reason I use coconut cream in this recipe. It has a high fat content, which gives these fudgesicles their creamy texture. Make sure you’re using coconut cream (the thick layer at the top of a can of chilled coconut milk or coconut cream) and not coconut milk.
I don’t recommend it. Coconut cream is what gives these that creamy fudgesicle consistency!
Personally, I’m sensitive to coconut flavor, and I don’t think they do! The chocolate flavor is much stronger.
If they aren’t already gone in one day… these healthy fudgesicles will last up to 2 months in the freezer. To store them, I typically layer them in an airtight container with parchment paper between each pop.
More Summer Dessert Recipes
If you loved these homemade vegan fudgesicles, try these recipes next!


If you make this recipe, please be sure to leave a comment and ★★★★★ star rating below. Don’t forget to tag me on Instagram so I can see your creations!
Healthy Fudgesicles (Vegan, Dairy-Free)
Ingredients
- 1 cup non-dairy milk
- ½ cup coconut cream, thick part from the top of a can of coconut milk
- ½ cup cocoa powder
- ¼ cup maple syrup
- 1 tsp vanilla extract
Instructions
- Blend the mixture: Add the coconut cream, non-dairy milk, cocoa powder, maple syrup, and vanilla extract to a blender. Blend until smooth and creamy.
- Pour into molds: Pour the mixture evenly into popsicle molds.
- Insert sticks and freeze: Add popsicle sticks and freeze for 4–6 hours, or overnight.
- Remove and enjoy: Run the molds under warm water for 15–30 seconds, then gently pull out your fudgesicles. Enjoy!
- Optional: Drizzle with melted dark chocolate and chopped peanuts as I did in the photo.
Notes
- Use coconut cream, not coconut milk: Coconut cream is what gives you that rich, creamy texture, similar to a fudgesicle. Without it, they can turn icy.
- Use a silicone ice cream mold: This makes removing them sooo much easier.
- Having trouble removing your fudgesicles from the molds? I use silicone molds and they work like a dream every single time! Just run the molds under warm water for 15-30 seconds, and they will slide right out.
- Storage: They will last up to 2 months in the freezer. To store them, I typically layer them in an airtight container with parchment paper between each pop.

So good! I always wanted to make vegan chocolate popsicles. I can’t find a recipe until now, thanks Megan!😆❤️#happyholidays
I’m so happy you found a recipe you love! Enjoy, Diana 🙂
These fudgesicles are delicious! They are super easy to make and brought me back to my childhood. This recipe is a keeper!
I’m so happy you love them, Cynthia! Thanks so much for sharing your review and star rating 🙂
#happyholidays HANDS DOWN THE BEST FUDGESICLES. I make these for my toddler, and they are such an easy, guilt-free way to give her that sweet summer treat! Our whole family love love loves these!
Omg yay! It’s so great to hear that your whole family loves them (and that your toddler enjoys them too)! Thanks for entering the giveaway 😊
Very simple to make and so delicious!
Yay, I’m so glad you enjoyed these fudgesicles!
These are creamy and so chocolatey. My kids absolute love them and we have this recipe in our regular ice pop rotation. Classic and delicious!
Aw, I’m so happy you all love them, Hannah! Thank you for sharing!