3-ingredient Chia Jam
Make this easy 3-ingredient chia jam in 15 minutes! A healthy alternative to store-bought jam that’s naturally thickened with chia seeds (instead of sugar) for a boost of omega-3s and fiber. Perfect for spreading on toast, swirling in oatmeal, spooning over yogurt, and more!

I haven’t bought jam since I started making this homemade chia jam. It’s just SO easy and SO good. I’ve been especially loving it in these peanut butter and jelly overnight oats.
Most store-bought jams are loaded with processed sugars, additives, and preservatives. But this jam is made with only 3 ingredients (fruit, maple syrup, and chia seeds) and ready in 15 minutes. The secret here is the chia seeds. They naturally thicken the jam while also adding a boost of fiber and omega-3s.
Table of Contents
How easy is it? Well, you just heat the fruit until it breaks down, then stir in the maple syrup and chia seeds. Let it sit while the chia seeds get to work thickening the jam. After a few minutes, you’ll have the perfect spreadable consistency of jam, and you’ll be wanting to spread this on everything!
Why You’ll Love This Chia Jam Recipe
- Only 3 ingredients (fruit, chia seeds, and maple syrup)
- Healthier alternative to store-bought jams
- Easy to make + ready in 15 minutes
- Works with any juicy fruit (strawberries, raspberries, blueberries, blackberries, cherries, peaches, apricots, kiwi, or pineapple)
- Perfect balance of sweet and tart
- Vegan, gluten-free, refined sugar-free, and naturally sweetened.

Ingredients Needed
You only need 3 simple ingredients to make this chia seed jam recipe!
- Fruit: Start by grabbing your favorite juicy fruit (fresh or frozen). I love using mixed frozen berries (blueberries, blackberries, strawberries, and raspberries) for an easy mixed berry jam, but almost any fruit will work here: strawberries, raspberries, blueberries, blackberries, cherries, peaches, apricots, kiwi, or pineapple.
- Chia Seeds: The star of the show! Chia seeds naturally gel and thicken the jam without the need for refined sugar or pectin. They also add a boost of fiber and omega-3 fatty acids.
- Maple Syrup: Adds a touch of sweetness to balance the tartness of the fruit. You can easily adjust the amount depending on how sweet your fruit is or how sweet you like your jam. For example, raspberries tend to be more tart than strawberries, so they may need a little extra sweetness. Honey (not vegan) or agave will work here too.
Scroll down to the recipe card to get the full recipe with measurements!
Fresh Fruit vs Frozen Fruit
Both fresh and frozen fruit work perfectly for making chia jam. I actually recommend using frozen fruit as it’s often more affordable and just as nutritious (if not more) than fresh fruit.
Most frozen fruit is picked at peak ripeness and quickly frozen, preserving its nutrients. In contrast, fresh fruit is typically transported over long distances, which can cause it to lose some of its nutritional value by the time it reaches your kitchen.
But if you’re heading to the farmers market, go ahead and grab some fresh fruit for a seasonal jam!
How to Make Easy Chia Seed Jam
You’ll be surprised how quickly and easily this chia jam recipe comes together — just a few simple steps!
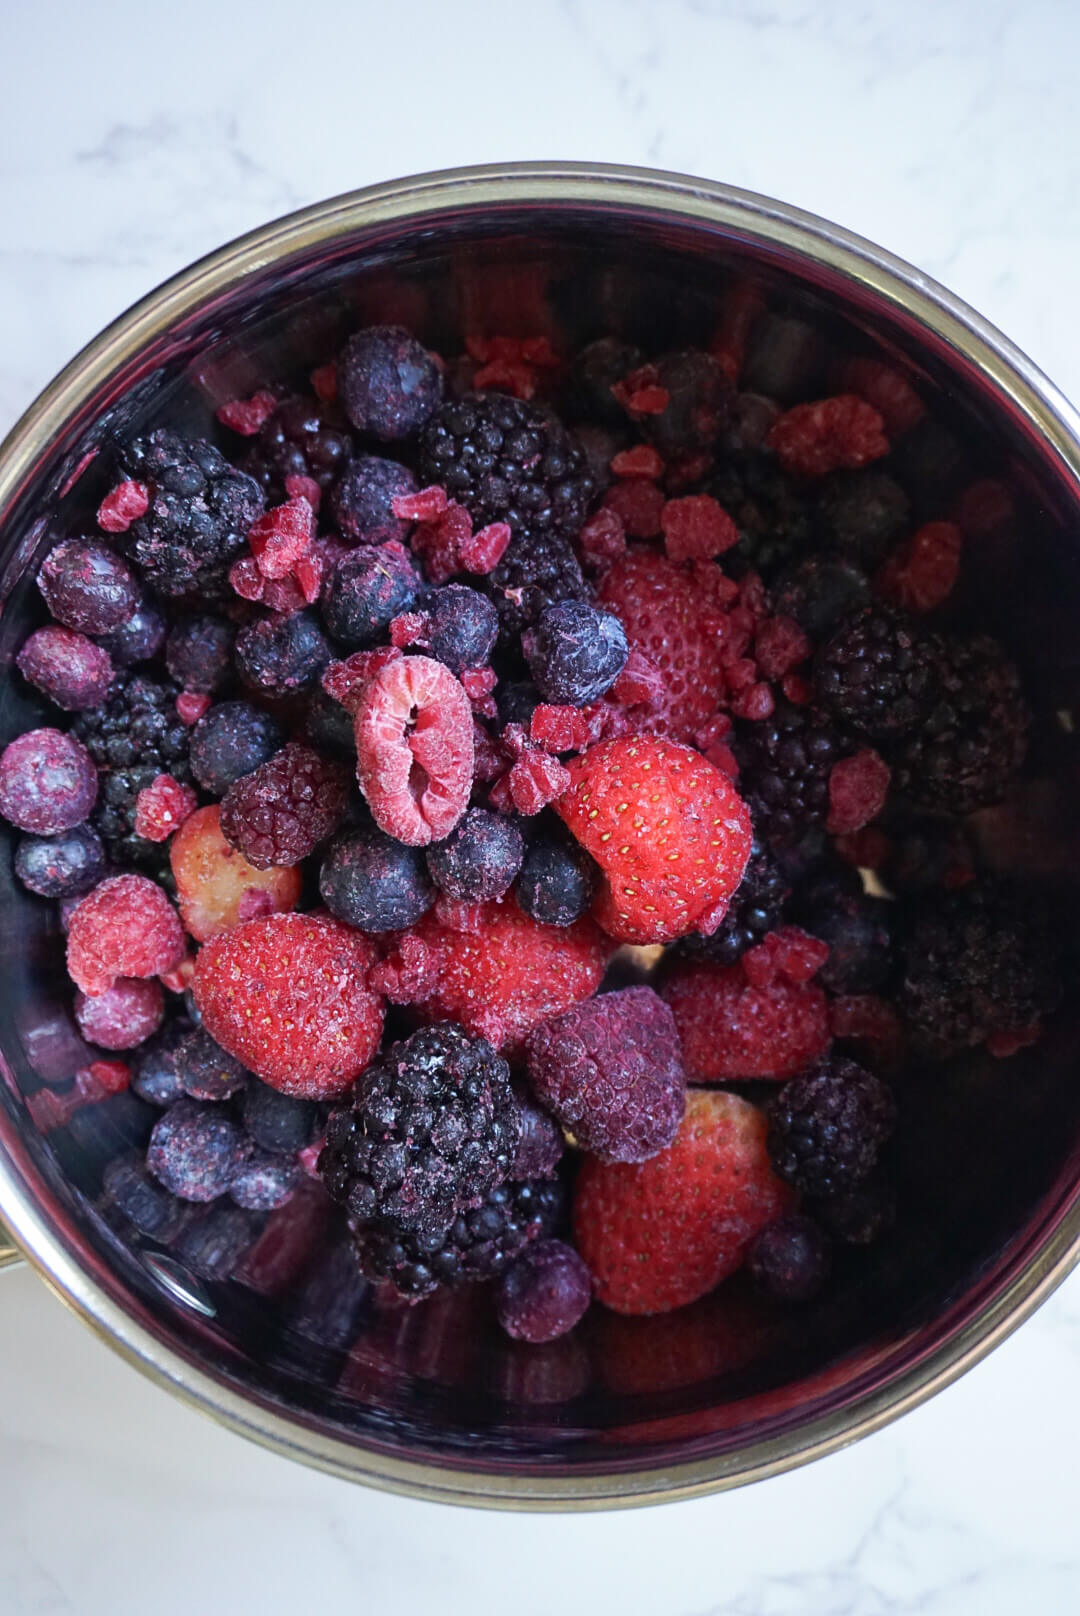
- Simmer the fruit: Add the fruit to a small saucepan over medium heat. Cook for 5-10 minutes, stirring occasionally, until the fruit begins to break down and release its juices. Then, use a fork or potato masher to mash the fruit to your desired consistency.

- Stir in the chia seeds: Remove the pot from the heat and stir in the chia seeds and maple syrup.
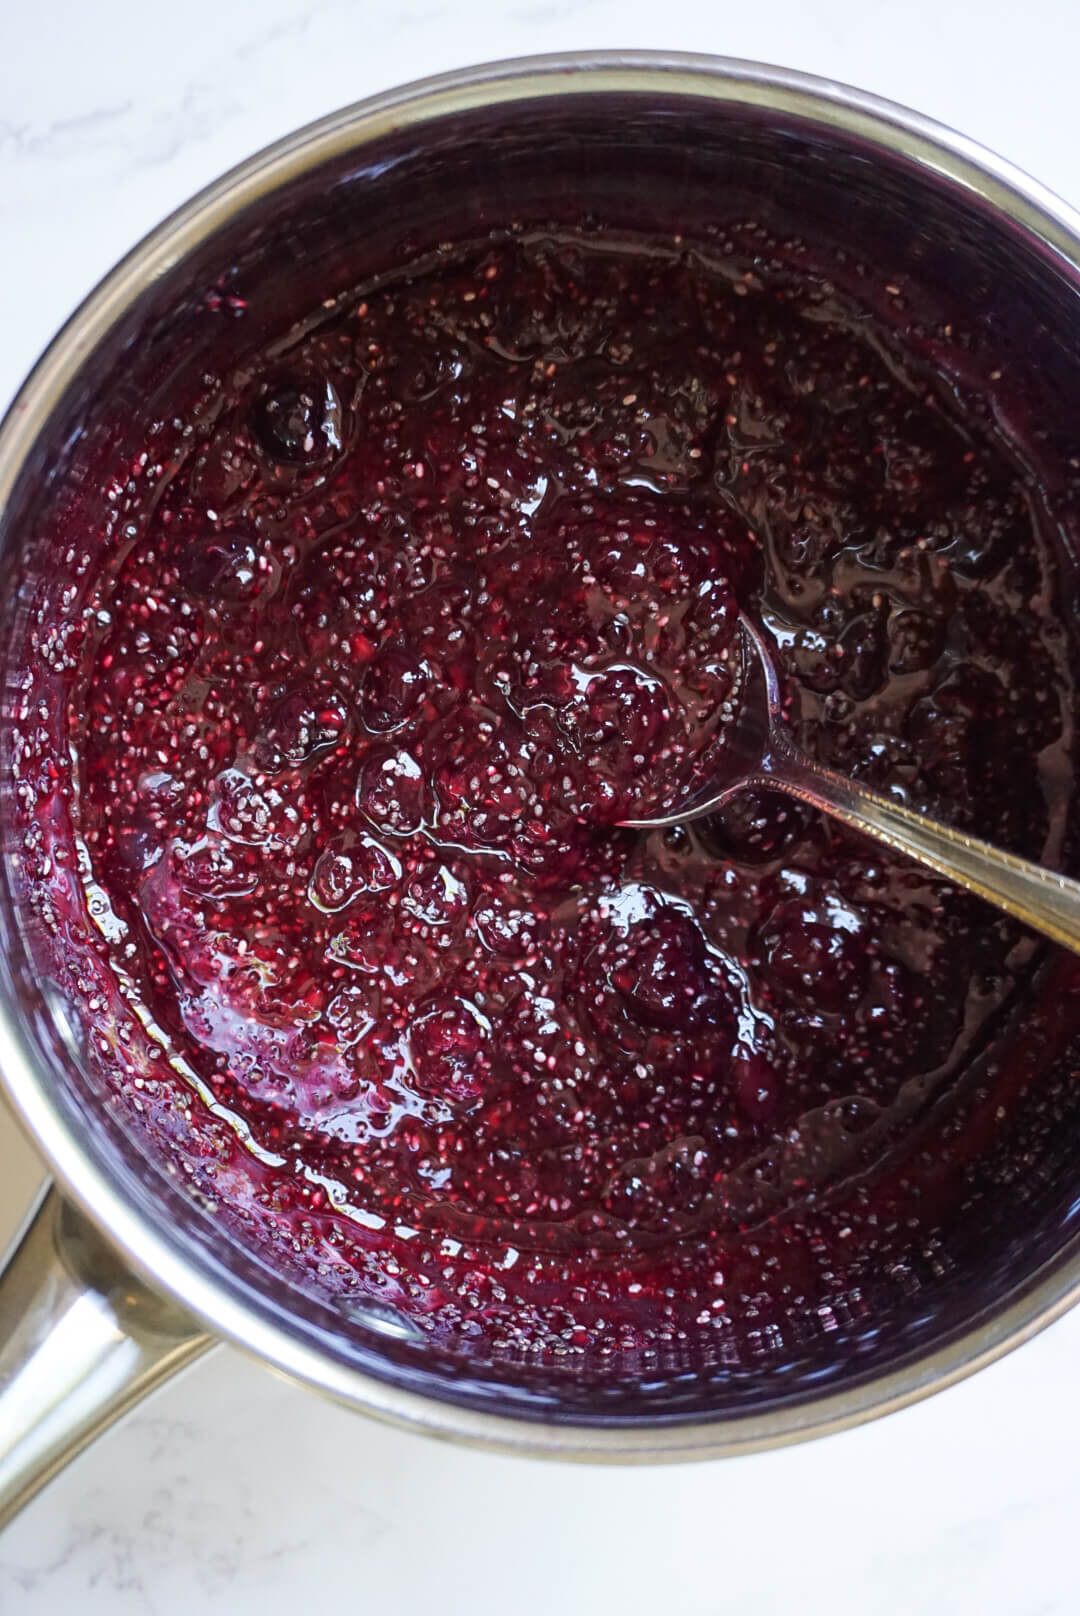
- Let it cool: Set it aside to cool. It will thicken as it cools, creating a jam-like texture.
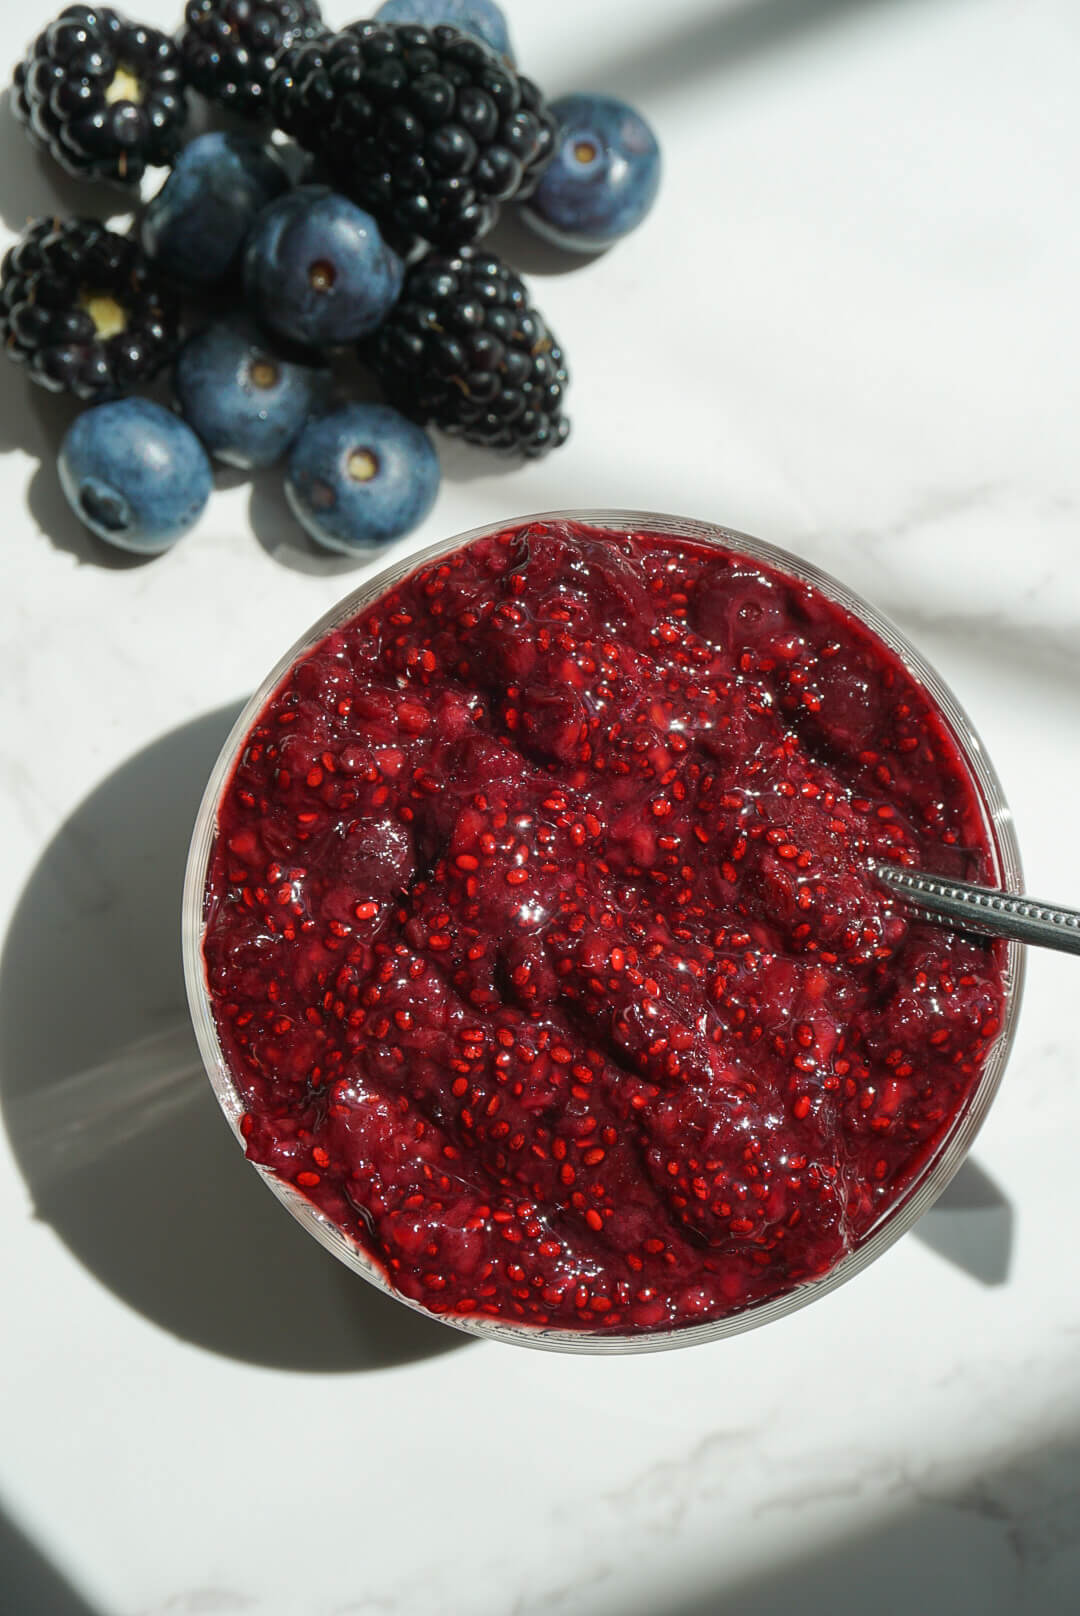
- Store and enjoy: Transfer to a jar and store in the refrigerator. Enjoy!
Megan’s Tips
- Use whatever fruit you love most! Frozen fruit works beautifully year-round, and seasonal fresh fruit is always a great option when it’s available.
- Taste and adjust. Keep in mind that every fruit is different when it comes to sweetness and liquid content. For example, pineapple releases more liquid than strawberries, and raspberries are more tart than blueberries. So taste as you go and adjust the sweetener to your preference.
- Want a smoother jam? Blend the fruit after it’s finished cooking and before adding the chia seeds. I personally love the texture with the chunks of fruit.
Serving Suggestions
Lately, I’ve been loving this chia jam on sourdough with vegan cream cheese, almond butter, and blueberries (as pictured below). It’s also delicious:
- Spread on toast or vegan banana pancakes
- In a peanut butter and jelly sandwich
- Swirled into yogurt or these peanut butter and jelly overnight oats
- Layered in parfaits
- Stuffed in dates, like my peanut butter & chia jam stuffed dates


Chia Jam FAQS
Typically any juicy fruit will work; fresh or frozen. The most popular are strawberries, raspberries, blueberries, blackberries, cherries, peaches, apricots, and pineapple. Just keep in mind that some fruits have a higher water content (like pineapple) or are more tart (like raspberries), so adjust the amount of sweetener accordingly.
Yes! I actually prefer using frozen fruit when making chia jam because it’s just as nutritious as fresh fruit. Plus, it’s often more affordable and available year-round.
Chia jam will set within 15-20 minutes, but it will thicken considerably more as it cools. By the next day, you’ll have a deliciously thick jam.
If your chia jam is too thick, add a bit of water to thin it out until you’ve reach your desired consistency.
Transfer the jam to an airtight container and store in the refrigerator for up to a week.


If you make this recipe, please be sure to leave a comment and ★★★★★ star rating below. Don’t forget to tag me on Instagram so I can see your creations!

3-ingredient Chia Jam
Equipment
Ingredients
- 2 cups fruit, fresh or frozen
- 2 tablespoons chia seeds
- 1-2 tablespoons maple syrup, or honey or agave
Instructions
- Simmer the fruit: Add the fruit to a small saucepan over medium heat. Simmer for 5-10 minutes, stirring occasionally, until the fruit begins to break down and release its juices. Then, use a fork or potato masher to mash the fruit to your desired consistency.
- Stir in the chia seeds + maple syrup: Remove the pot from the heat and stir in the chia seeds and maple syrup. Taste and adjust, adding more maple syrup if you prefer a sweeter jam.
- Let it cool: Set it aside to cool. It will thicken as it cools, creating a jam-like texture. Store in the refrigerator for up to a week. This recipe makes about 1 cup of jam. Enjoy!
Notes
- Use whatever fruit you love most! Frozen fruit works beautifully year-round, and seasonal fresh fruit is always a great option when it’s available.
- Taste and adjust. Keep in mind that every fruit is different when it comes to sweetness and liquid content. For example, pineapple releases more liquid than strawberries, and raspberries are more tart than blueberries. So taste as you go and adjust the sweetener to your preference.
- Want a smoother jam? Blend the fruit after it’s finished cooking and before adding the chia seeds. I personally love the texture with the chunks of fruit.
- Storing your homemade jam. Transfer the jam to an airtight container and store in the refrigerator for up to a week.


This jam was very good, but i did have to add more maple syrup. I had it on sourdough toast with peanut butter.
#happyholidays
This jam was really good, but of course my sweet tooth needed more maple syrup. Lol yum. I had it on sourdough toast with peanut butter. Peanut butter and jelly is one of my favorite sandwiches.
#happyholidays
I thought it was very good. Had it with peanut butter. I had it on sourdough toast which made it very tasty. #happyholidays.
Great idea with chia seeds!!!
I hope you love it 🙂 chia jam is my favorite kind of jam!
Thank you so much for sending the recipe, I am already dreaming of all the fruits I will try! Two questions: can one add 1/2 the amount of maple syrup and some stevia? Have you tried this with fresh figs?
Hi there! Yes, you can reduce the maple syrup and add stevia if you’d like, though it may be sweet enough without it depending on which fruits you use. I haven’t tried making it with fresh figs (now I want to!), but I think it would come out delicious! Let me know if you give it a try. 🙂
Love it! How long do you think it will keep in the fridge?
Thank you!
Hi Lara, it should last 8-10 days when stored in an airtight container in the fridge (if it’s not already gone by then!). Enjoy!