Homemade Thin Mints (Vegan, Gluten Free)
These homemade thin mints are crispy, chocolatey, perfectly minty, and taste even better than the classic Girl Scout cookie! Made with simple ingredients that are vegan, gluten-free, and refined sugar-free.

Recently, I’ve been obsessed with recreating classic Girl Scout cookies with a better-for-you twist. It started with my homemade samoas cookies, then moved on to my personal favorite tagalongs, and now we’re making thin mints.
Girl Scout cookie season always brings back memories of coming home from school, grabbing a sleeve of Thin Mints, and watching Disney Channel. Ah, the good ole days. My mom would keep them in the freezer so they were extra crunchy and even more minty. IYKYK.
Inspired by those nostalgic chocolate mint cookies, I decided to recreate them in a healthier way, but still so delicious.
These homemade thin mints have everything you love about the classic cookie — a crisp chocolate cookie base, refreshing peppermint flavor, and covered in dark chocolate — but made with a few simple ingredients.
Why You’ll Love These Homemade Thin Mints
- Taste just like the classic Thin Mint cookies
- Made with simple, wholesome ingredients
- Vegan, gluten-free + refined sugar-free
- Easy and fun to make at home
- Kid-approved (thanks to my neighborhood Girl Scouts)

Ingredients You’ll Need
What I love most about this recipe is how simple the ingredients list is! You’re just 7 ingredients away from making your very own thin mints.
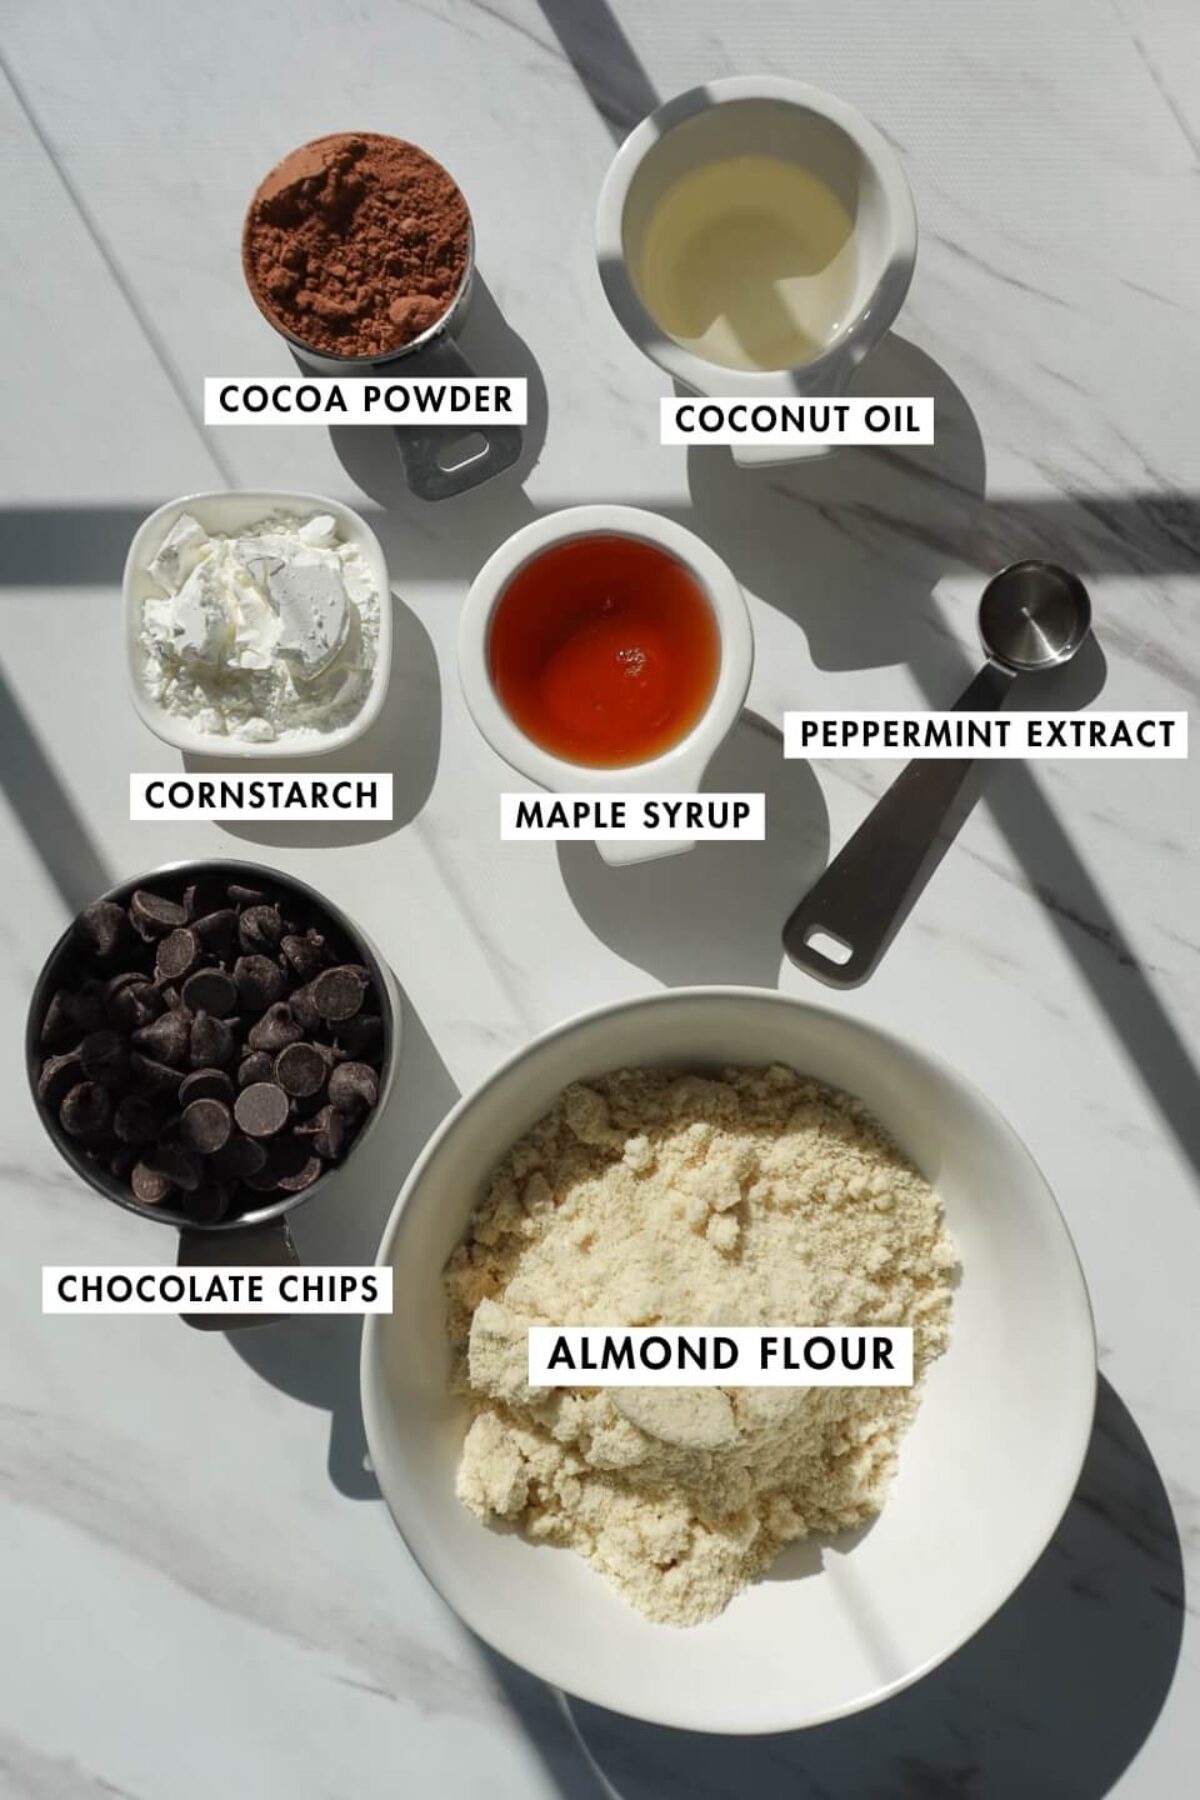
- Almond Flour (blanched): The base of the cookie. I love baking with almond flour for its nutrient density, naturally tender texture, and it keeps this recipe naturally gluten-free!
- Cocoa Powder: Adds that rich chocolate flavor.
- Cornstarch: Helps thicken the dough for that crispy bite.
- Maple Syrup: For natural sweetness.
- Coconut Oil: Use refined coconut oil for a neutral flavor.
- Peppermint Extract: What’s Thin Mints without peppermint?
- Vegan Chocolate Chips: Use dairy-free chocolate chips to keep this recipe vegan.
This is just a recipe overview! Scroll down to the recipe card to get the full recipe with measurements.
How to Make Homemade Thin Mints
This homemade thin mints recipe is easy to make in just a few simple steps:
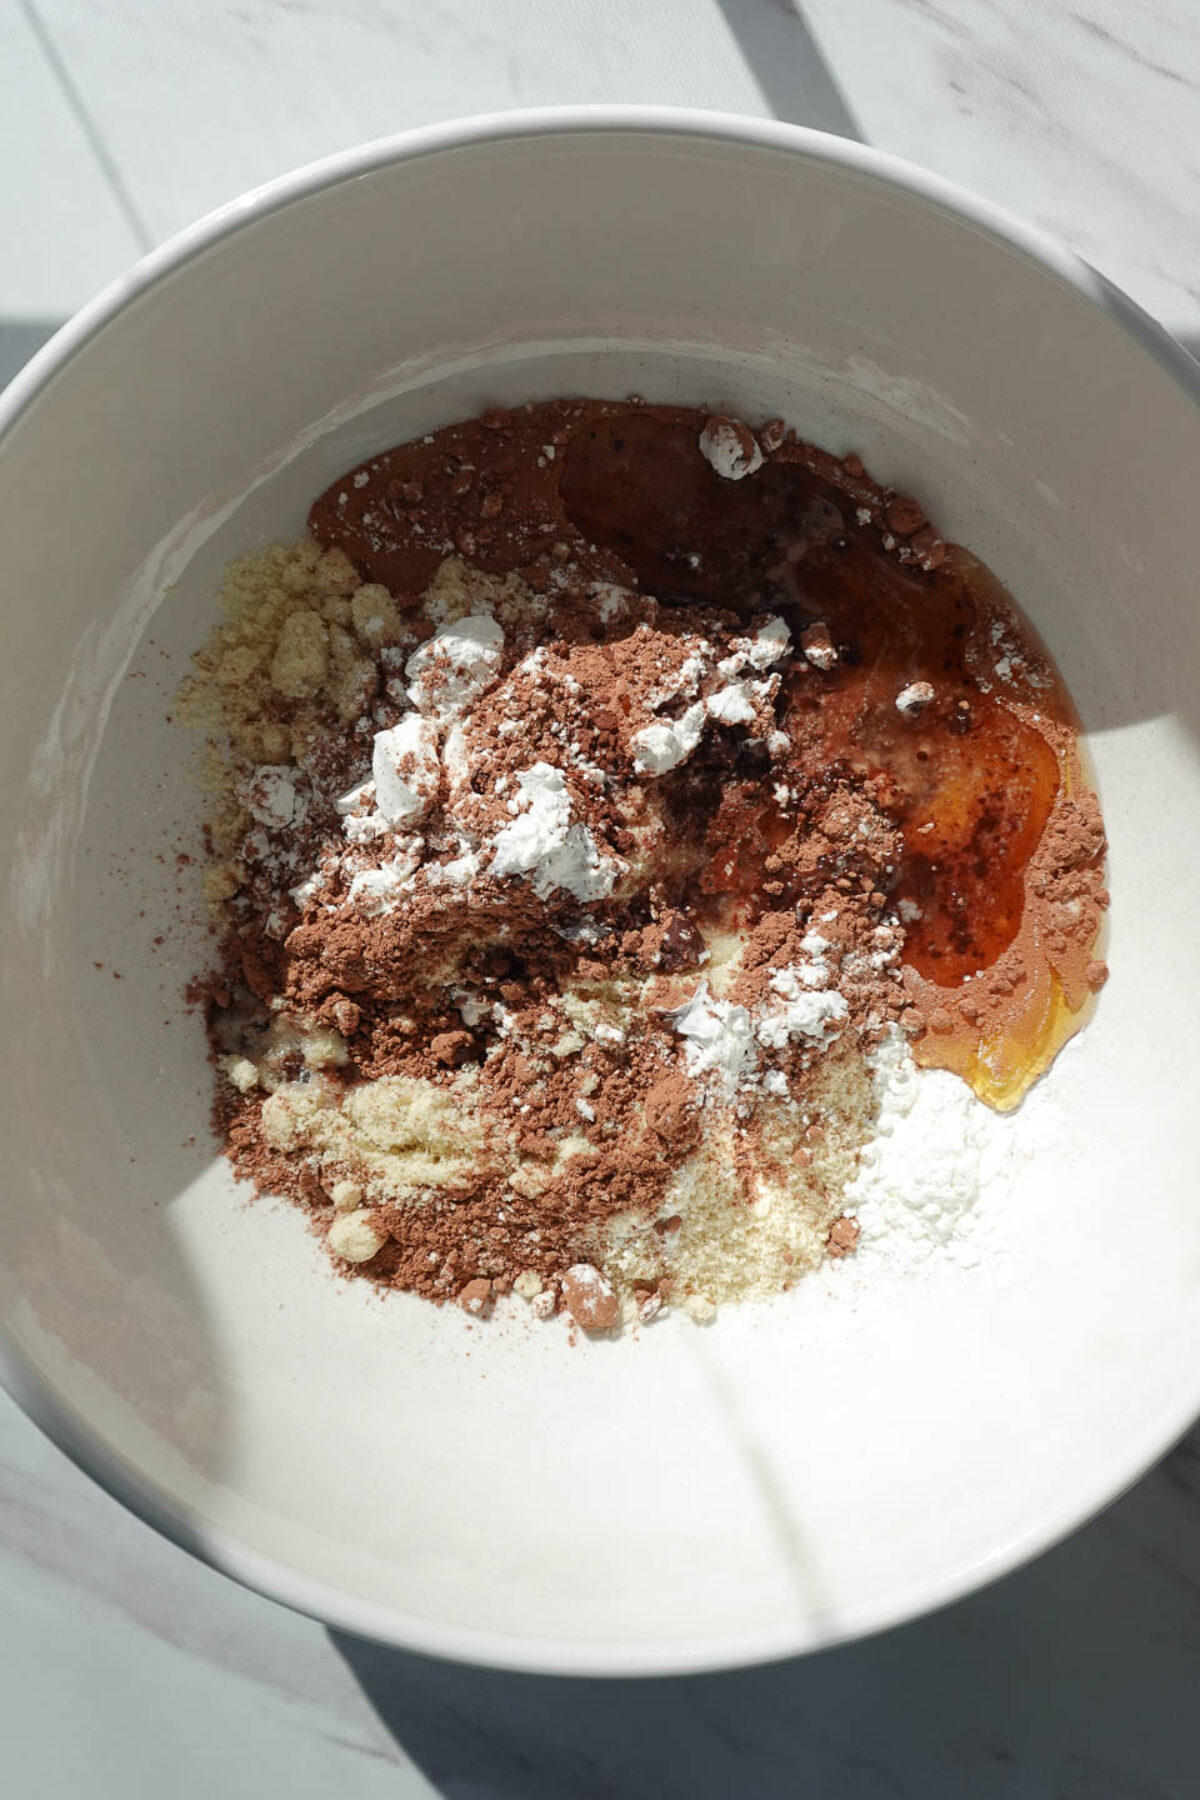
- Add the ingredients to a bowl: To a large bowl, add the almond flour, cornstarch, cocoa powder, salt, maple syrup, melted coconut oil, and peppermint extract.
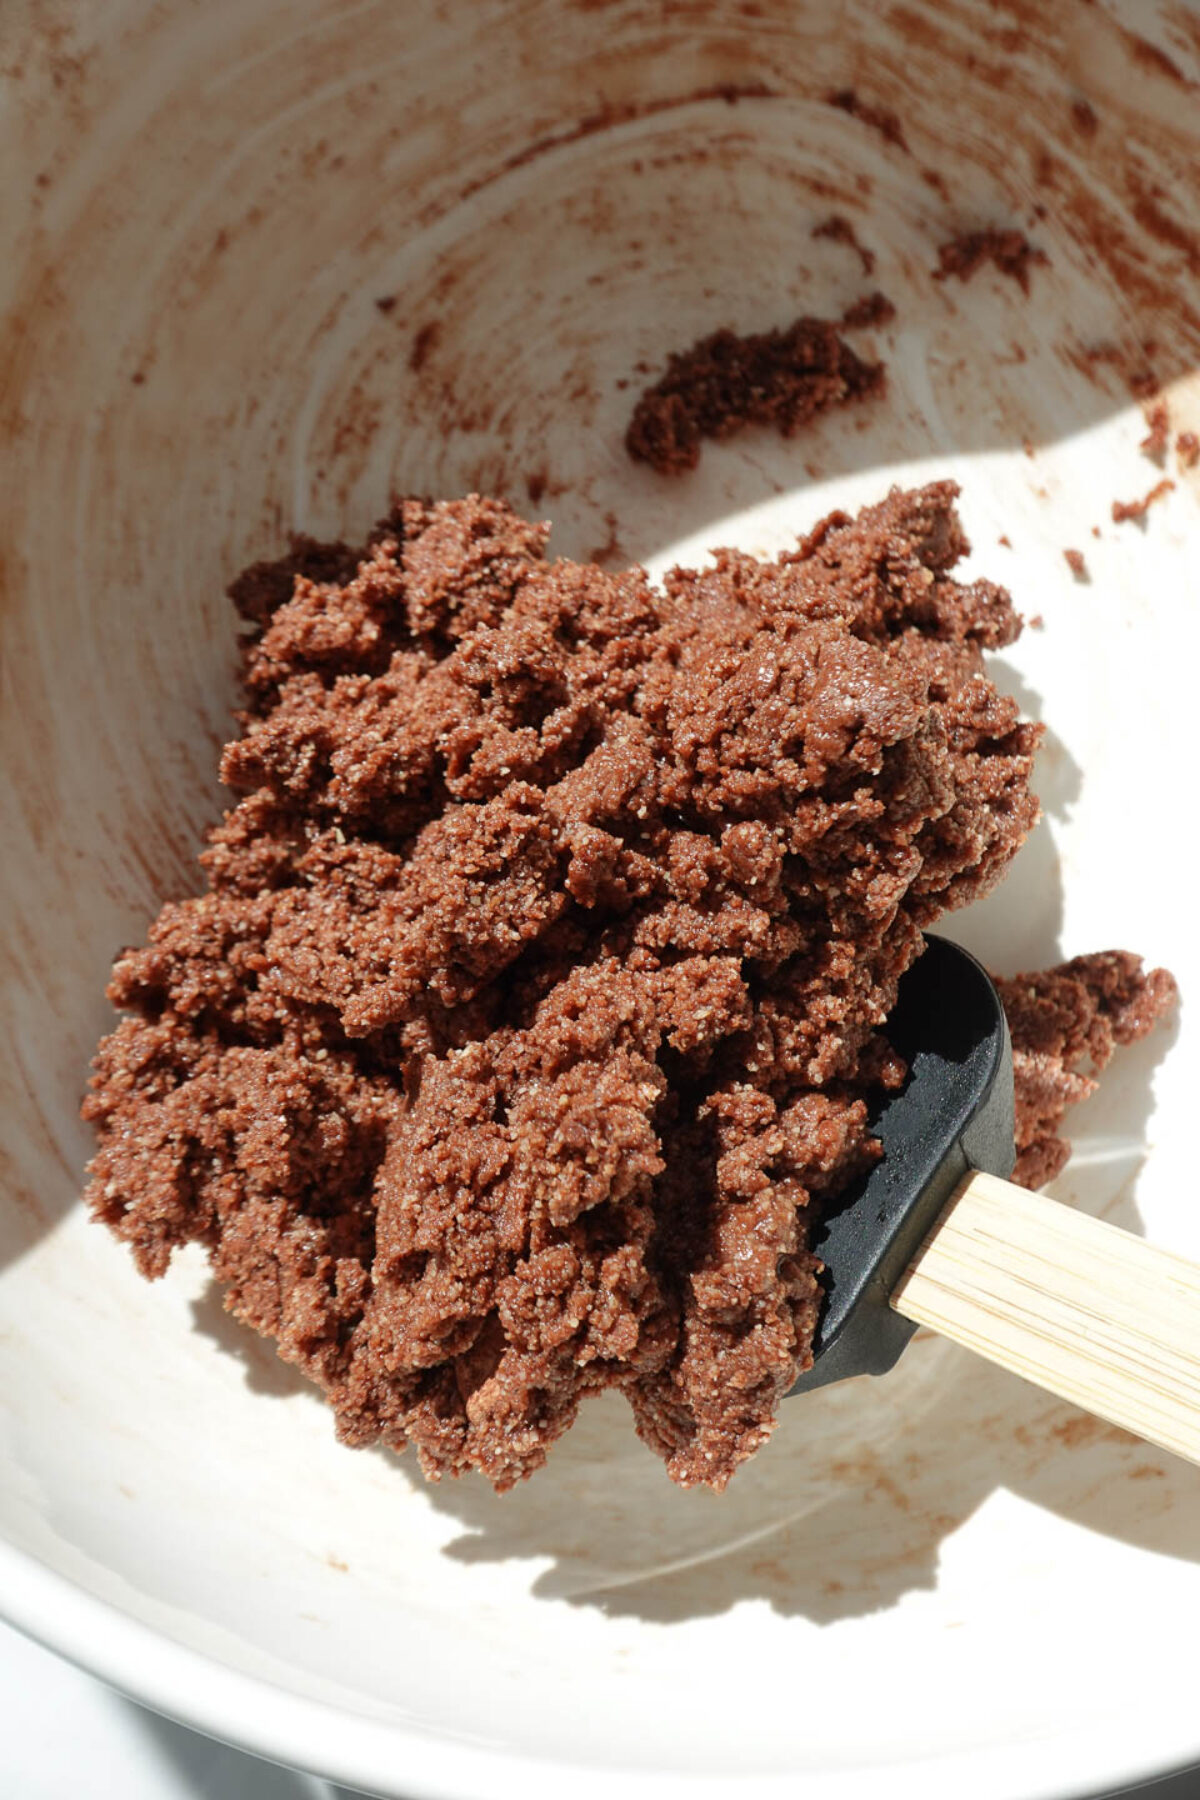
- Mix the dough: Mix until a sticky dough forms. If the dough is too wet, add more almond flour, one tablespoon at a time, until it is soft and slightly sticky but not too dry. If the dough is too dry, add a little water, one teaspoon at a time, until it is soft and slightly sticky but not overly wet.
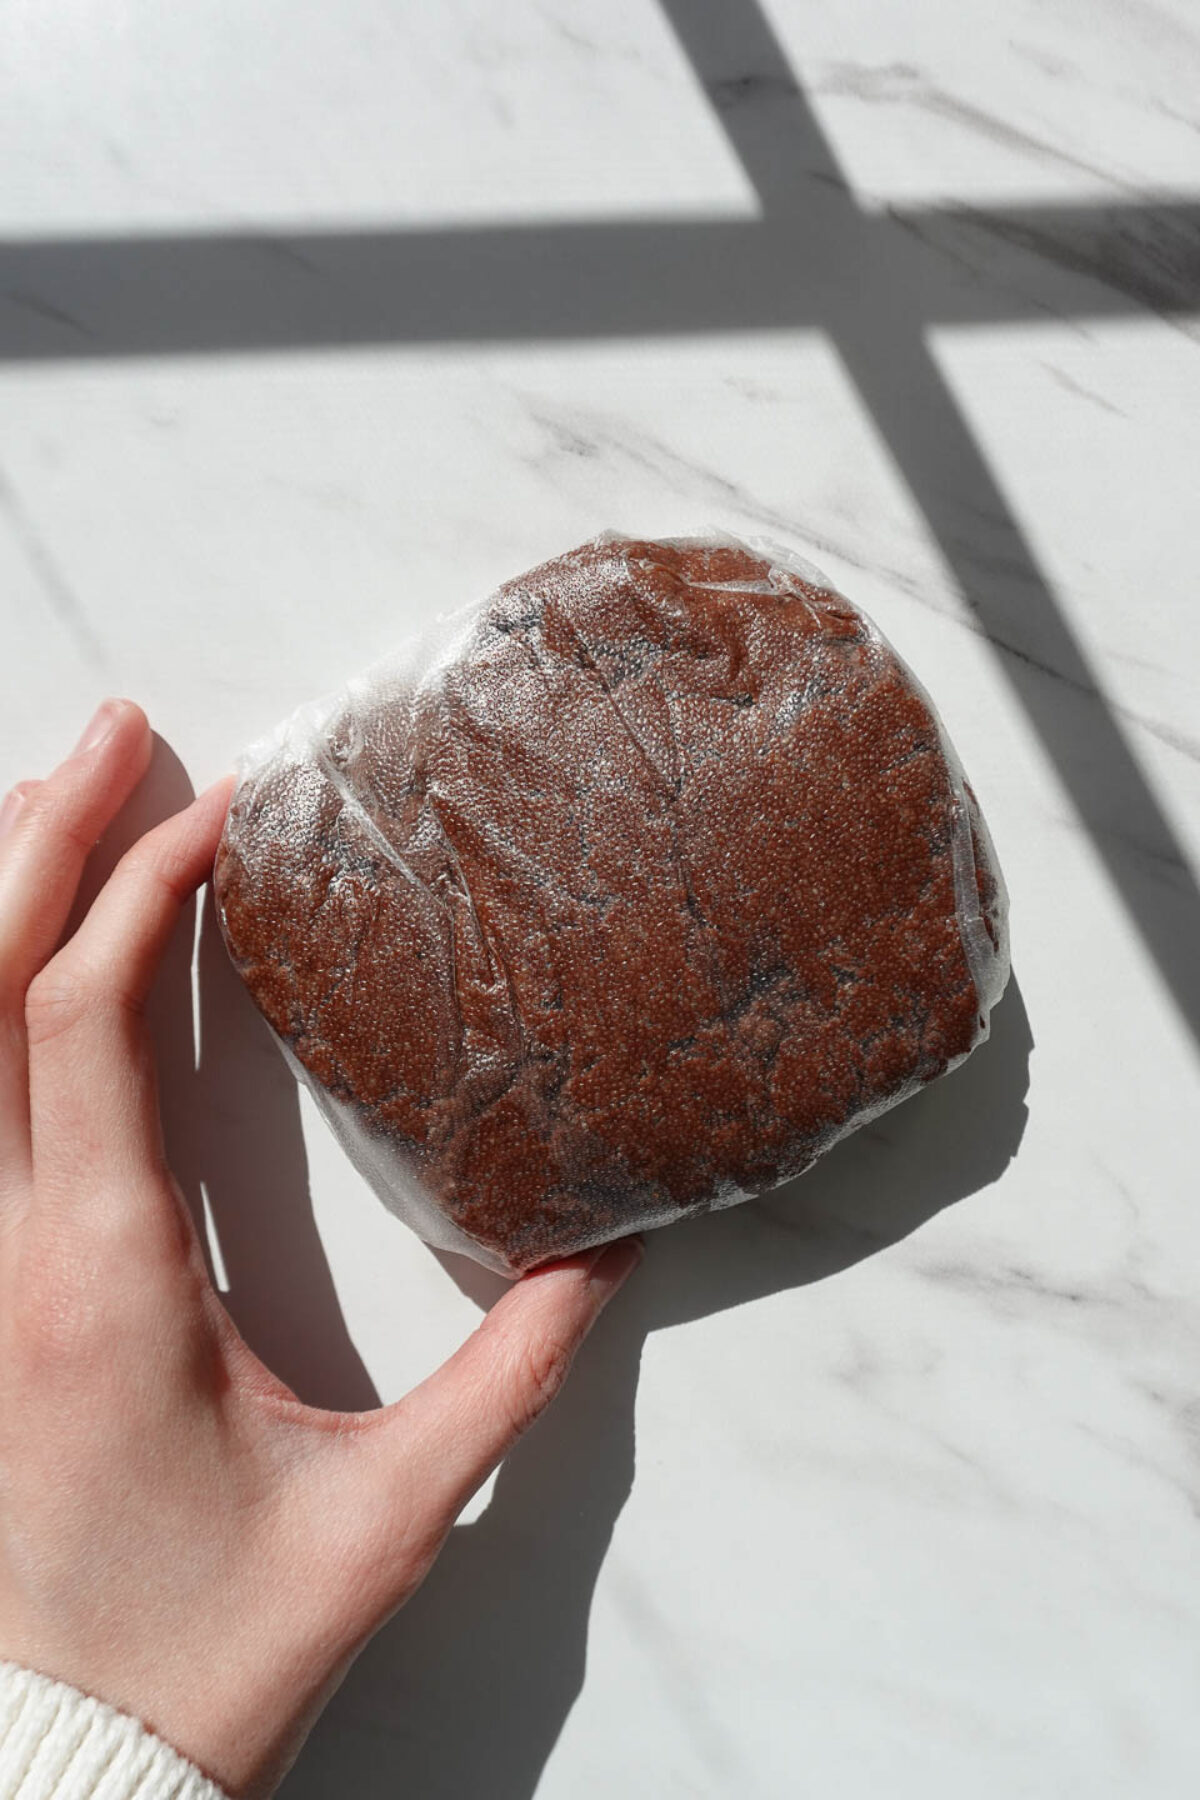
- Chill the dough: Shape the dough into a disc, wrap it in plastic wrap, and freeze for at least 30 minutes to firm up.
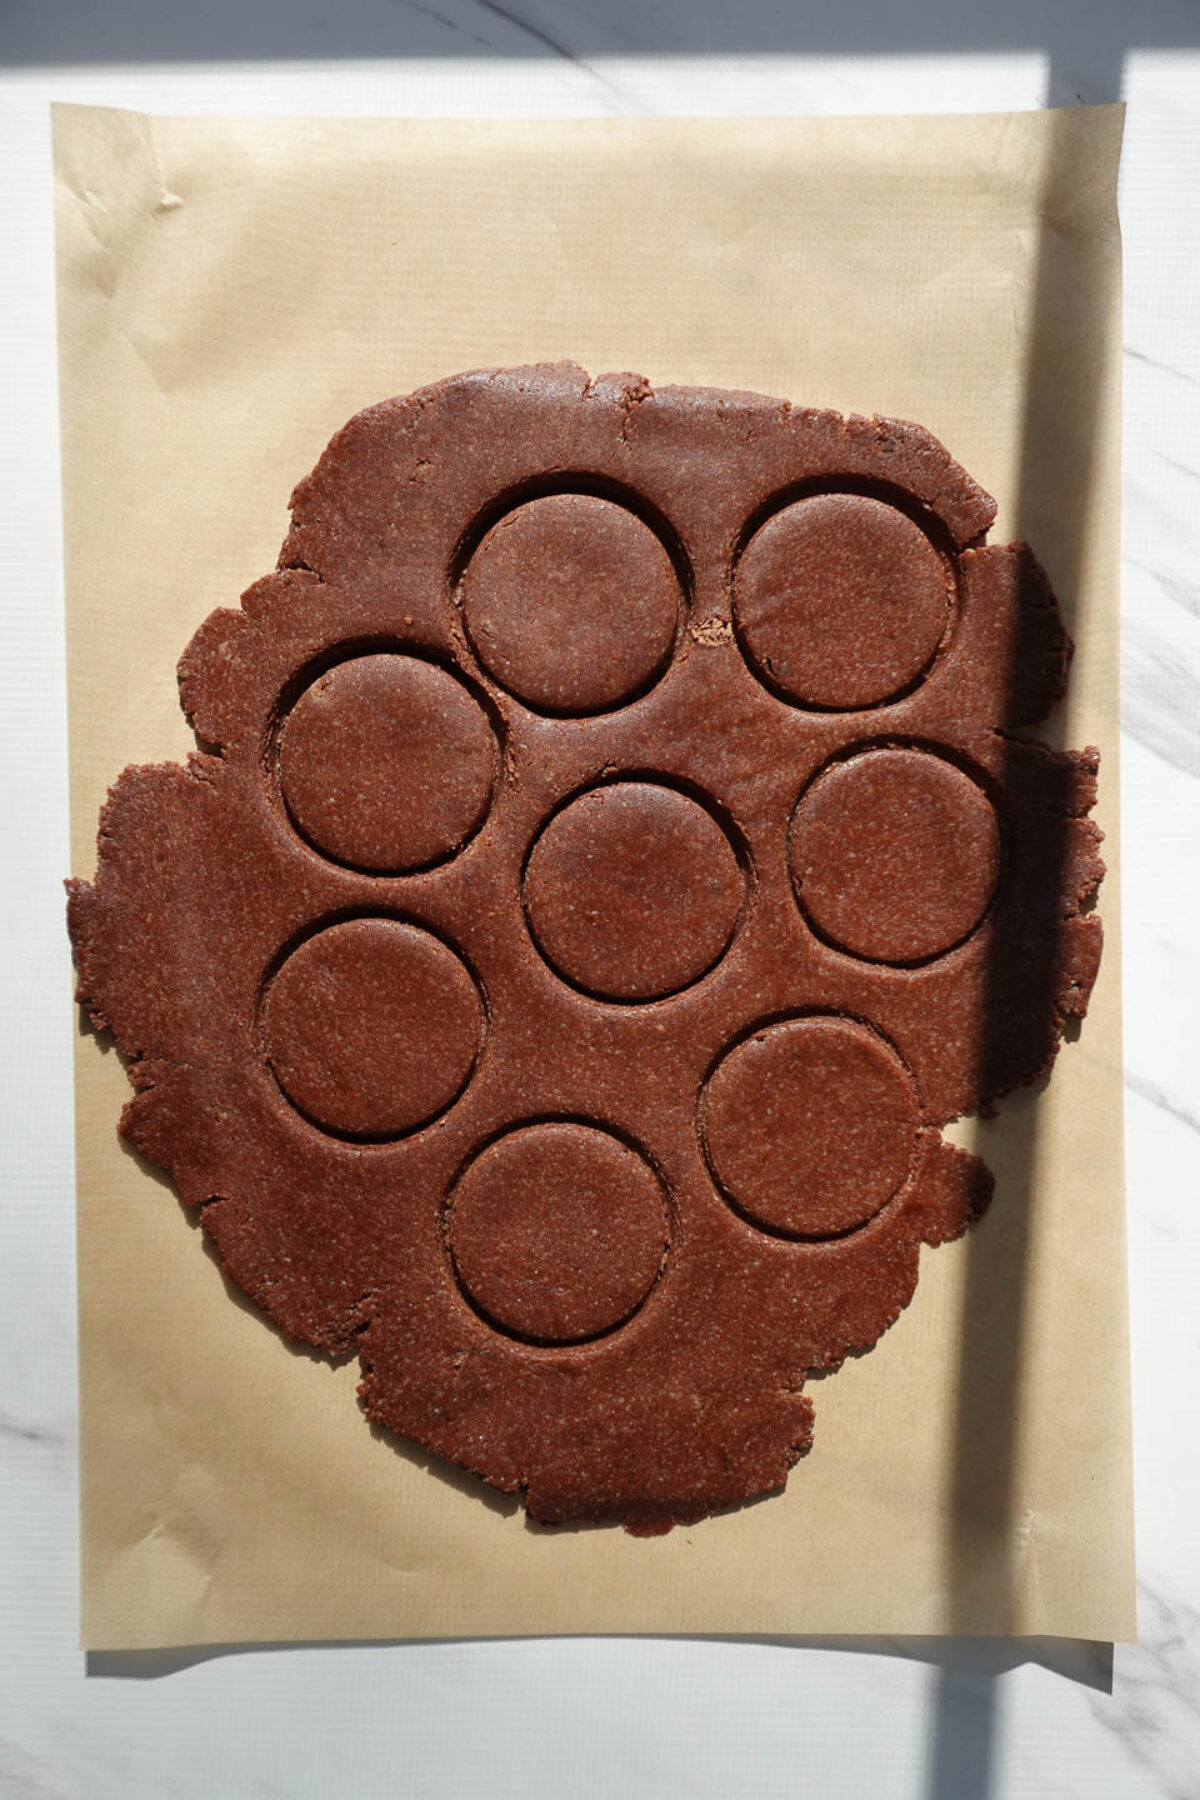
- Cut the cookies: Place the dough between two sheets of parchment paper and roll it out to about ¼-inch thickness. Use a small cookie cutter to cut out circles. If the dough softens too much while cutting, return it to the freezer for a few minutes. Re-roll the scraps and continue cutting until all the dough is used.
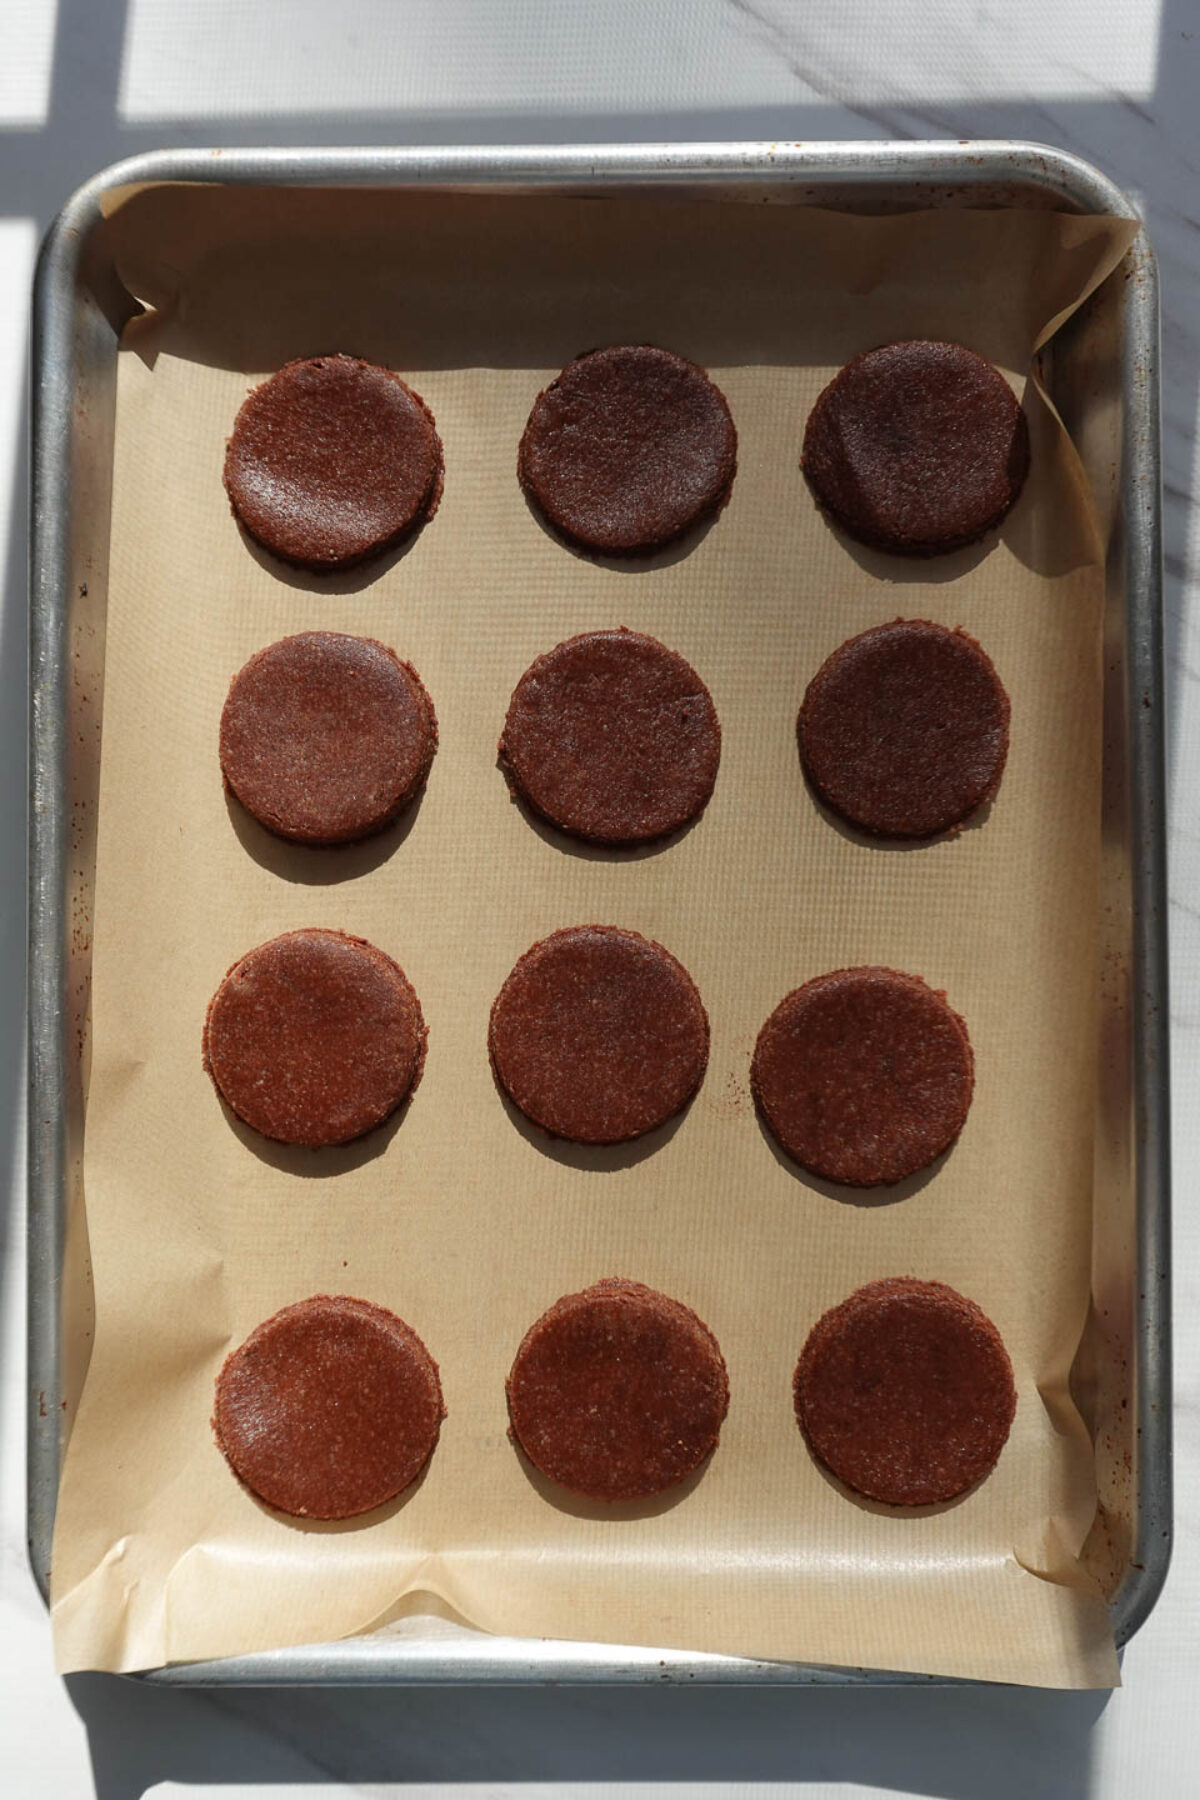
- Bake: Preheat the oven to 350°F and line a baking sheet with parchment paper. Place the tray of cookies in the freezer while the oven heats. Bake the cookies for 10-12 minutes. Remove them from the oven and let them rest on the baking sheet for at least 15 minutes, or until completely cooled. Since we’re using almond flour, the cookies will feel soft at first but will firm up as they cool!
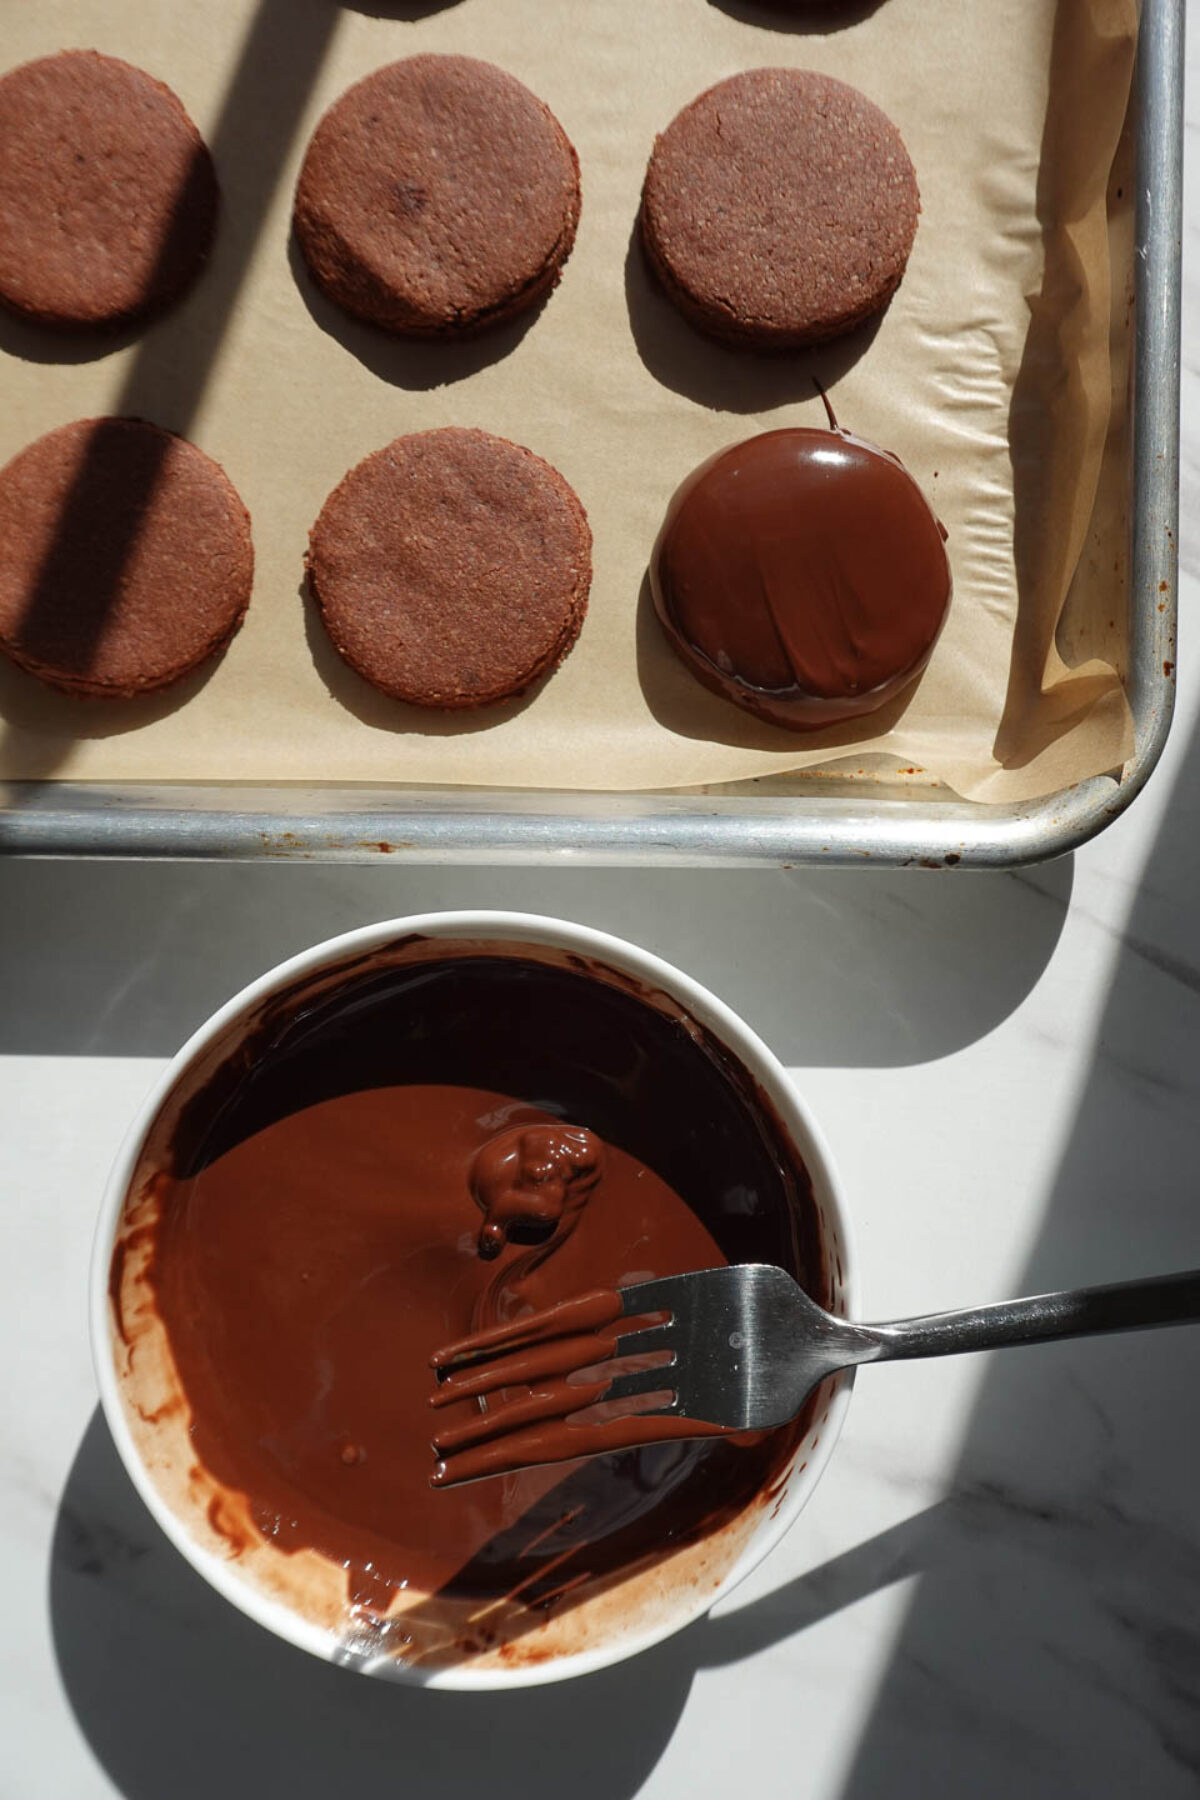
- Coat in Chocolate: Melt the chocolate chips and coconut oil until smooth, then stir in the peppermint extract. Using a fork, dip each cookie into the melted chocolate. Place back onto the parchment-lined tray. Chill until the chocolate hardens. Once the chocolate has set, dig in!
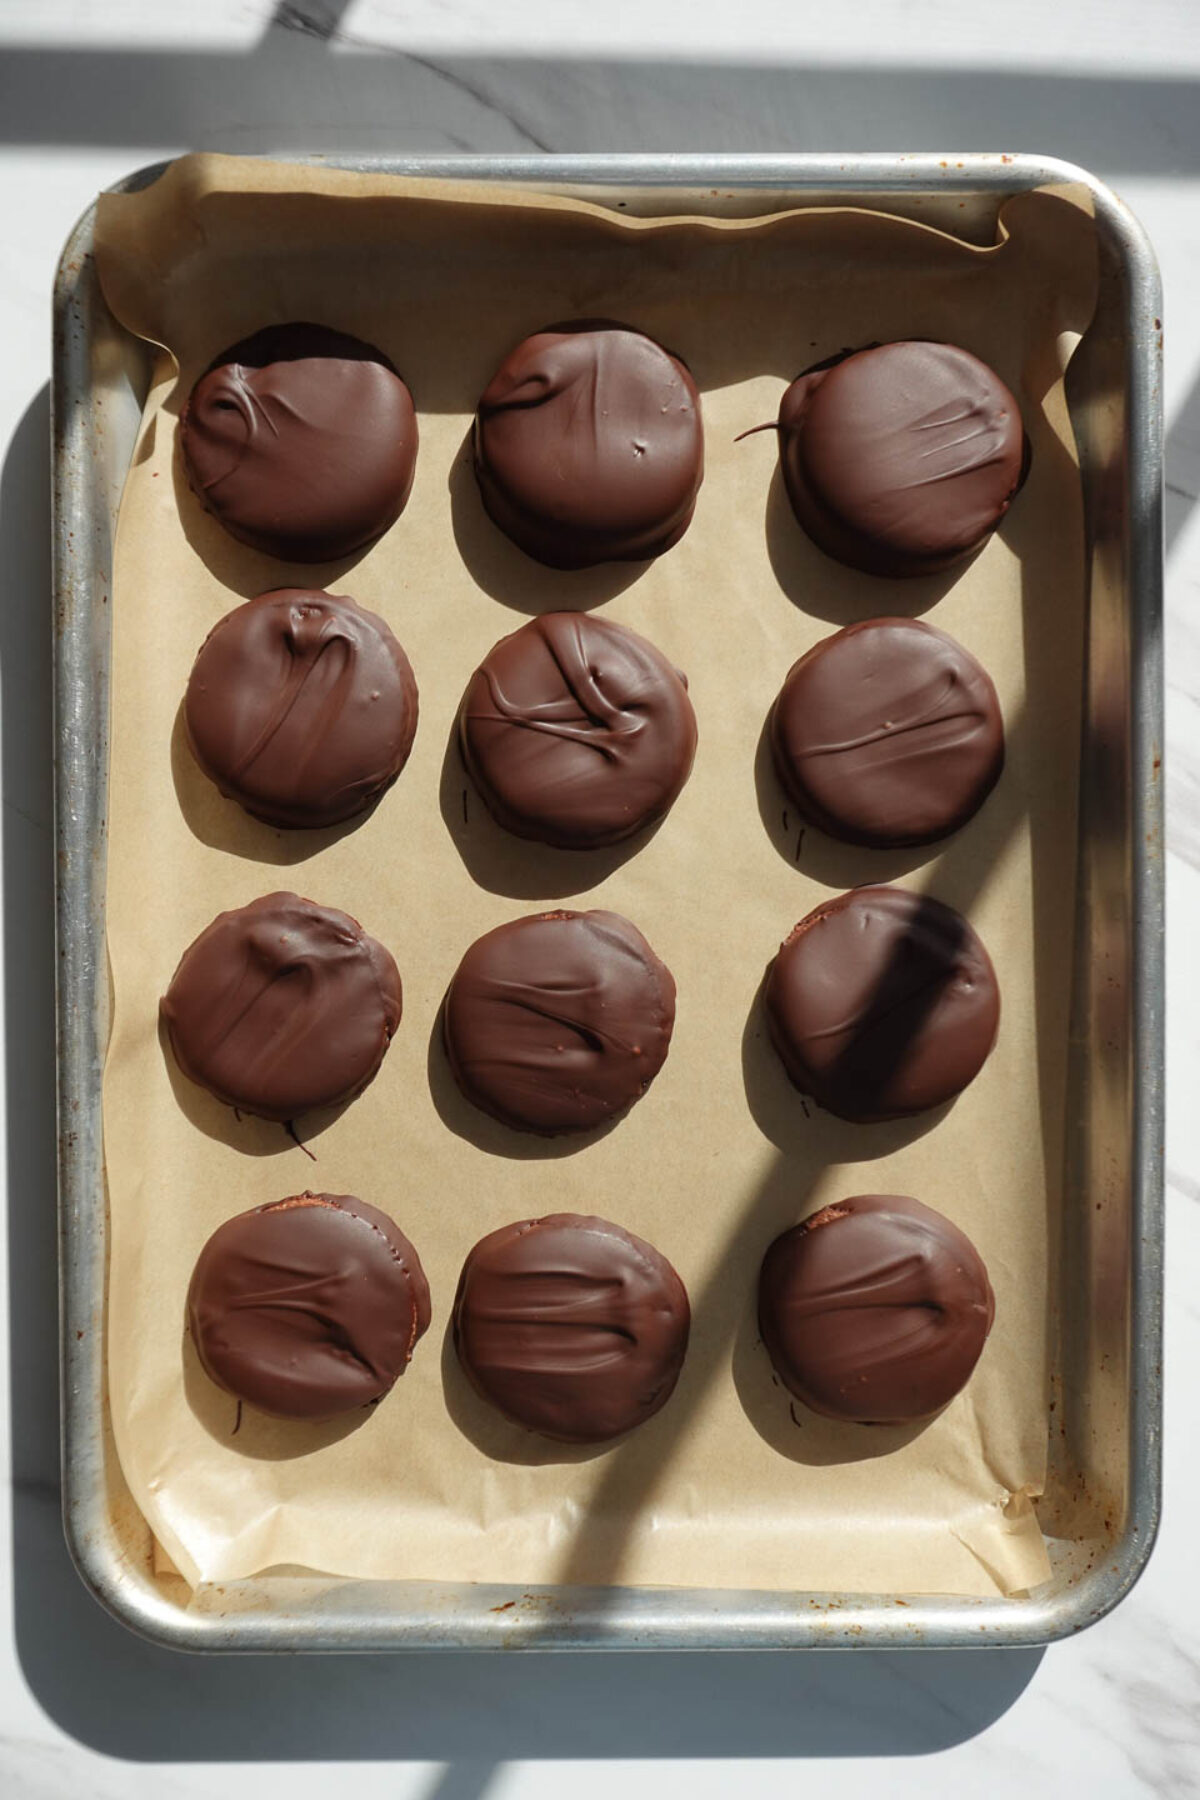
- Chill the cookies: Place the tray in the fridge (or freezer) to chill until the chocolate hardens.

- Enjoy: Once the chocolate has set, dig in and enjoy! These cookies taste best cold, just like the original Thin Mints.
Megan’s Tips
- Use peppermint extract. Make sure you’re using peppermint extract and not mint extract!
- Chill the dough. Freezing the dough for 10–15 minutes makes it easier to handle, especially when it comes to re-rolling out the dough.
- Don’t have a cookie cutter? Use a drinking glass with a thin rim that can cut through the dough and about 2-3 inches in diameter.
How to Store Thin Mints
If they aren’t already gone within 1 hour… store in an airtight container in the fridge for up to 1 week. My personal favorite way to store them? In the freezer! They’ll last about 3 months in the freezer.

More Girl Scout-Inspired Recipes
If you make this recipe, please be sure to leave a comment and ★★★★★ star rating below. Don’t forget to tag me on Instagram so I can see your creations!

Homemade Thin Mints (Vegan, Gluten-Free)
Equipment
Ingredients
Cookies
- 1 ¼ cup almond flour
- ¼ cup cocoa powder
- 2 tablespoons cornstarch
- pinch salt
- ¼ cup maple syrup
- 2 tablespoons refined coconut oil, melted
- ¾ teaspoon peppermint extract
Chocolate Coating
- 1 cup vegan chocolate chips
- 1 teaspoon refined coconut oil
- ¼ teaspoon peppermint extract
Instructions
- In a large bowl, whisk together the almond flour, cornstarch, cocoa powder, and salt.
- Stir in the maple syrup, melted coconut oil, and peppermint extract until a sticky dough forms. If the dough is too wet, add more almond flour, one tablespoon at a time, until it is soft and slightly sticky but not overly wet.
- Shape the dough into a disc, wrap it in plastic wrap, and freeze for at least 30 minutes to firm up.
- Place the dough between two sheets of parchment paper and roll it out to about ¼-inch thickness.
- Use a 1 ½-inch cookie cutter to cut out circles. If the dough softens too much while cutting, return it to the freezer for a few minutes. Re-roll the scraps and continue cutting until all the dough is used.
- Preheat the oven to 350°F and line a baking sheet with parchment paper. Place the tray of cookies in the freezer while the oven heats.
- Bake the cookies for 10-12 minutes. Remove them from the oven and let them rest on the baking sheet for at least 15 minutes, or until completely cooled. Since we’re using almond flour, the cookies will feel soft at first but will firm up as they cool!
- In a microwave-safe bowl, melt the chocolate chips and coconut oil in 30-second increments, stirring in between until smooth. Once melted, stir in the peppermint extract.
- Using a fork, dip each cookie into the melted chocolate, ensuring they are fully coated. Place them on a parchment-lined tray and refrigerate or freeze for 15-20 minutes until the chocolate hardens. If you have extra melted chocolate, drizzle it on top for a decorative touch. Once the chocolate has set, dig in! Store in an airtight container in the fridge for up to a week, or in the freezer for longer (IYKYK).
Video
Notes
- Use peppermint extract. Make sure you’re using peppermint extract and not mint extract!
- Chill the dough. Freezing the dough for 10–15 minutes makes it easier to handle, especially when it comes to re-rolling out the dough.
- Don’t have a cookie cutter? Use a drinking glass with a thin rim that can cut through the dough and about 2-3 inches in diameter.


These taste even better than thin mints in my opinion! A huge hit!